
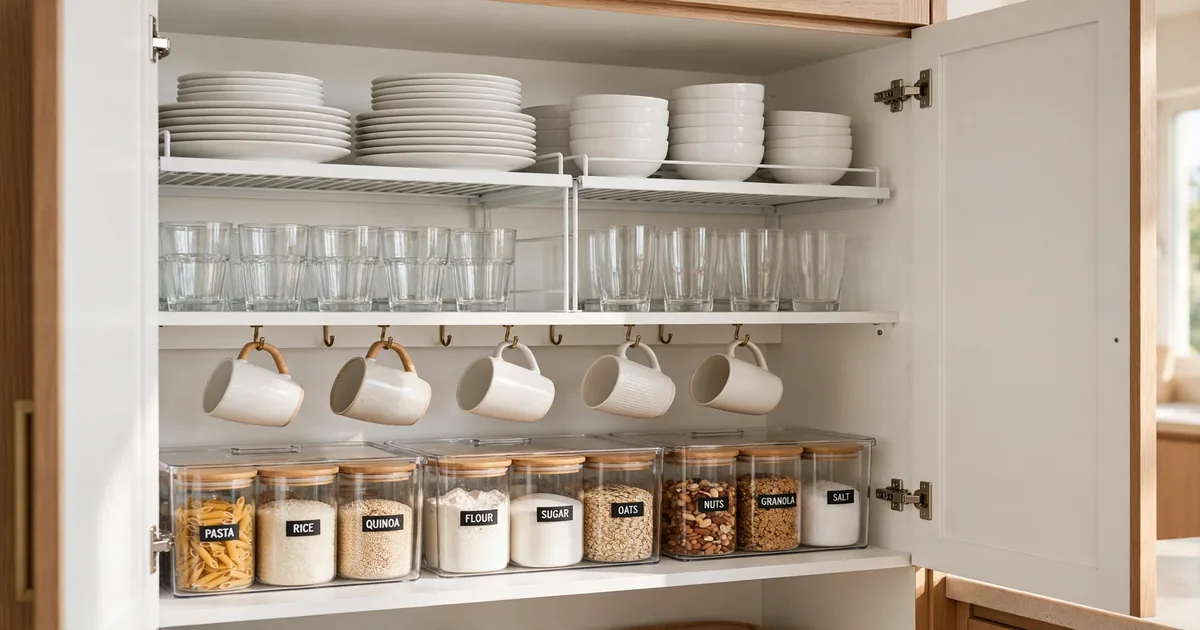

Open any one of your kitchen cabinets right now and take an honest look. Is there a stack of plates leaning like the Tower of Pisa? A tangle of plastic containers with lids that never seem to match? Most of us have at least one cabinet that makes us sigh every time we open it. These kitchen cabinet organization ideas are built for real kitchens — the ones with mismatched mugs, a junk corner, and a renter who can’t drill a single hole.
I learned this the hard way in my last apartment, where the cabinets were shallow, the blind corner cabinet swallowed Tupperware whole, and I once found a bag of flour I bought two years earlier hiding behind the baking sheets. Nothing in that kitchen changed — same cabinets, same tiny footprint — but once I reorganized the insides with a plan, cooking dinner stopped feeling like an archaeological dig.
Why Kitchen Cabinet Organization Ideas Beat New Cabinets Every Time
It is tempting to believe the answer is more space. But in almost every messy kitchen I’ve seen, the real problem isn’t square footage — it’s that the space inside the cabinets is used badly. Tall cabinets hold a single stack of dishes with a foot of dead air above them. Corner cabinets become black holes. Everything migrates to wherever it landed last.
A proper cabinet reorganization costs very little and takes one weekend afternoon. The payoff is daily: you reach for a bowl without moving three things first, you can actually see what food you own before you shop, and cleanup after dinner takes minutes instead of a full episode of negotiations with your dishes. Even if you rent and can’t touch the structure of the kitchen, every idea below works without a drill, a renovation, or a landlord’s permission.
Start With a Full Cabinet Reset (Before Buying a Single Organizer)
Here is the mistake most people make: they buy organizers first, then try to arrange their stuff around them. Do it the other way round. Empty one cabinet completely — yes, all of it, onto the counter — and sort everything into three groups.
- Everyday: the plates, bowls, glasses, and mugs you genuinely use several times a week.
- Sometimes: serving dishes, the big roasting pan, the fondue set someone gave you in 2022.
- Never: chipped mugs, containers without lids, duplicates of things you forgot you owned.
The “never” pile goes straight to donation or the bin — do not let it sit in a bag by the door for three weeks. The “sometimes” pile earns the worst spots in the kitchen: the highest shelves, the deepest corners. The “everyday” pile gets prime real estate, the shelves at chest-to-eye height where reaching is effortless. This one decision — matching item frequency to shelf height — does more for a kitchen than any product ever will.
Before anything goes back in, wipe the shelves down and consider a simple shelf liner. It’s cheap, it stops glasses from sliding, and it makes spills a non-event instead of a sticky mystery.
Upper Cabinets: Dishes, Glasses, and the Everyday Zone
Upper cabinets should hold the things you touch every day: dishes, glasses, mugs, bowls. The golden rule is that the heaviest items go on the lowest shelves, where lifting is safe and easy.
Stack Smarter, Not Higher
That leaning stack of twelve dinner plates is an accident waiting to happen. Keep stacks to six or eight plates maximum, and use shelf risers — those simple wire or bamboo platforms — to create a second level inside a tall cabinet. Suddenly you have a top row for bowls and a bottom row for plates, each fully visible and grab-able. The same trick works beautifully for mugs: a two-tier riser doubles mug capacity without the wobbly pyramid.
Glasses deserve their own rule: never nest them inside each other unless they’re designed for it. Stacked tumblers get stuck, and yanking them apart over a countertop is how glass breaks. Line them up in a single row instead, and if shelf depth allows, put a slim riser behind for a second row of shorter glasses.
Put Cabinet Doors and Dead Corners to Work
The inside of a cabinet door is storage space you’re already paying for. Slim over-door racks hold cutting boards, plastic wrap boxes, or a spice collection with zero footprint inside the cabinet itself. Just check that the door still closes — measure twice, buy once.
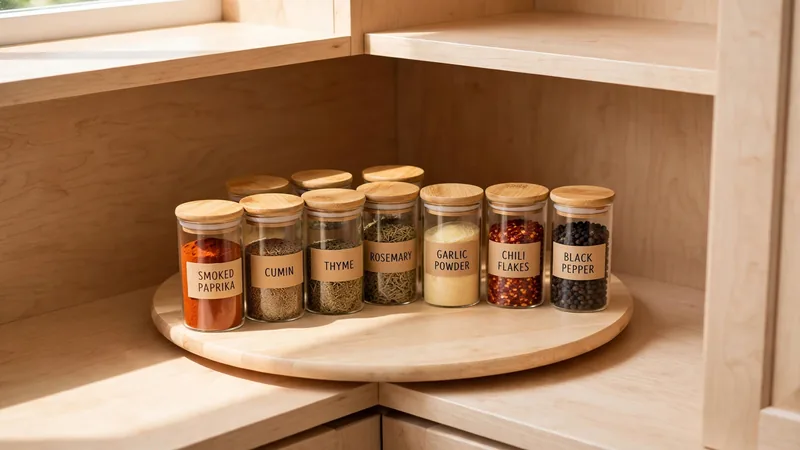
For upper corner cabinets, a small two-tier turntable can transform a dark corner into reachable space. Group the items on it loosely — baking extracts together, small jars together — so a spin brings the right category to you.
Kitchen Cabinet Organization Ideas for Blind Corner Cabinets
Every kitchen has one: the blind corner cabinet, where light goes to die and spatulas go to disappear. Standard shelves here are nearly useless because anything pushed past the door frame is gone forever. You need motion.
- Lazy Susan turntable: the classic for a reason. A large round turntable brings the back of the corner to the front with one spin. Perfect for oils, vinegars, canned goods, and cleaning supplies.
- Pull-out half-moon shelves: kidney-shaped shelves that swing out when the door opens. They cost more than a turntable but use nearly 100% of the corner.
- Grouped bins, no organizer: the budget play — two or three open bins labeled by category. You pull the whole bin out like a drawer. Not glamorous, but it works tonight with stuff from a dollar store.
Whatever you choose, go deeper on this topic with our guide to corner cabinet organization ideas, which walks through layouts for the trickiest corners in detail. The key principle stays the same: if you can’t see it, you won’t use it, so never store anything in a blind corner without a way to bring it to you.
One more corner rule: this is the ideal home for the “sometimes” items from your reset. Holiday platters, the waffle maker, the giant salad bowl — things you need occasionally and won’t mind reaching for.
Lower Cabinets: Pots, Pans, and Lids That Behave
Lower cabinets take the heaviest abuse in the kitchen, and they’re where most chaos lives. The physics are simple: heavy things should never be stacked high or buried deep.
Stop Stacking Pots Like Pancakes
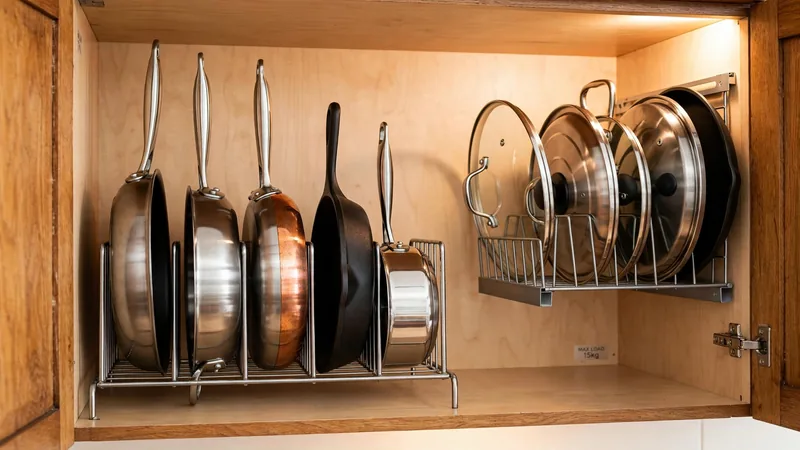
A vertical pan rack — the kind that holds baking sheets, cutting boards, and skillets upright like files in a filing cabinet — is the single best upgrade for a lower cabinet. You can see every pan at a glance and pull one out without unstacking five others. For round pots, nesting is fine as long as you protect the surfaces: a paper towel, a felt pad, or a cheap silicone liner between each pot stops scratches.
Lids are the true enemy. They slide, they clatter, they take up twice the space they should. Mount a simple lid rack on the cabinet door or a vertical divider inside, and file them upright. For the full treatment on this topic, see our pot and lid storage ideas guide — your future self, the one who needs the medium saucepan lid at 6pm on a Tuesday, will thank you.
Roll-Out Shelves: the Lower-Cabinet Game Changer
If you have one lower cabinet that is deep and dark — the one under the counter where the slow cooker lives — a roll-out shelf turns it into a drawer. These come in standard widths, install with a few screws (or tension-fit versions exist for renters), and they end the kneel-and-reach routine forever. Small appliances are the ideal residents: the blender, the food processor, the stand mixer you use weekly. Speaking of which, if your small appliances are colonizing the countertop, our small appliance storage ideas will help you give each one a real home inside the cabinets instead.
Keep Spices and Small Items Visible
Spice jars are small, numerous, and nearly identical — the perfect recipe for cabinet chaos. The fix is visibility. A tiered step riser inside the cabinet lifts each row so you can read every label. Alphabetize them while you’re at it; it sounds fussy, but you’ll find the cumin in two seconds instead of twenty.
For a deeper system — decanting, labeling, drawer inserts, and what to do with bulk spice bags — check out our spice organization ideas. And apply the same logic to everything small: tea bags, packets of yeast, bouillon cubes. Small clear bins with labels beat loose items every time, because a bin has edges and loose items don’t.
A quick word on the “everything” drawer situation: if your cabinet reorganization pushes overflow into drawers, at least give those drawers dividers. One undivided drawer becomes a junk drawer within a week; dividers are the cheapest discipline you can buy.
Keep It Organized: the 5-Minute Weekly Cabinet Reset
The best-organized cabinet in the world drifts back toward chaos without maintenance. The good news: it takes almost no effort if you do it regularly. Once a week — Sunday evening works for most people — open each cabinet and do a sixty-second scan. Return anything that migrated, wipe up any crumbs, and check dates on anything open. Five minutes total for the whole kitchen.
Two habits protect the system long-term:
- One in, one out: every new mug, pan, or gadget that enters the kitchen means an old one leaves. This single rule prevents the slow creep that fills cabinets again.
- Put it back immediately: the “I’ll deal with this later” pile is how clutter starts. Dishes go back to their labeled homes right after the dishwasher unloads, not after they’ve dried on the counter for a day.
Cabinets that stay organized aren’t the result of a one-time heroic effort — they’re the result of a system so simple that maintaining it is easier than letting it slide. Build the zones, give everything a visible home, and your kitchen will quietly stay the calm, workable space you want it to be.
That’s the whole game with kitchen cabinet organization ideas: not perfection, just a kitchen where you can find the lid, reach the bowl, and actually enjoy making dinner. Start with one cabinet this weekend — the one that bothers you most — and let the momentum carry you through the rest.
[…] When a lid doesn’t obviously belong to the container in your hand, you toss them back in the cabinet separately — lids in one drift, bases in another. Soon you have a floating population of orphans: […]
[…] bursting, that’s useful information — your cabinets need attention too, and our guide to kitchen cabinet organization ideas walks through exactly how to fix […]
[…] space, budget, and tolerance for DIY — and if you’re also sorting out the rest of the room, our kitchen cabinet organization ideas guide pairs well with this […]
[…] those items a closed home instead. A well-planned kitchen cabinet organization system is the partner open shelves need — closed cabinets absorb the visual noise so open shelves […]
[…] buying an organizer half an inch too tall for the shelf above it. Treat this as part of your wider kitchen cabinet organization ideas, so the whole cabinet works […]