

You know the sound. You reach into a lower cabinet for one baking sheet, and the whole stack shifts, slides, and crashes forward in a noisy avalanche of metal. A muffin tin clatters to the floor. A cooling rack wedges itself sideways. By the time you have rescued the sheet you actually wanted, you have also pulled out three things you did not need, and you are already dreading putting them back. Good baking sheet organization is not about having a prettier cabinet. It is about ending that small, daily frustration for good.
Most of us store baking sheets flat, stacked in a pile, shoved into the first cabinet that fits them. In practice, a stack is the worst system for thin, flat, awkwardly sized pans: you cannot see what is at the bottom, and you cannot grab one without disturbing the rest. The fix is rarely a bigger kitchen. It is a different way of thinking about the space you already have.
Why Baking Sheets Always Turn Into a Mess
Baking sheets are wide but thin, rigid but light, and they come in just enough sizes to never quite nest neatly. A half-sheet pan, a quarter-sheet pan, a jelly roll pan, and a cookie sheet might look similar, but their rims and corners catch on each other. Add a pizza stone, a couple of muffin tins, and a wire cooling rack or two, and you have a pile that behaves more like a deck of cards in a windstorm than a tidy stack.
Worse, they usually end up in a deep lower cabinet you have to crouch to reach into. Once something slides to the back, it effectively disappears. You buy a replacement, or you stop using the pan altogether, and the pile quietly grows.
The fix needs no renovation, just one decision: stop stacking, start filing.
Baking Sheet Organization Starts With Filing, Not Stacking
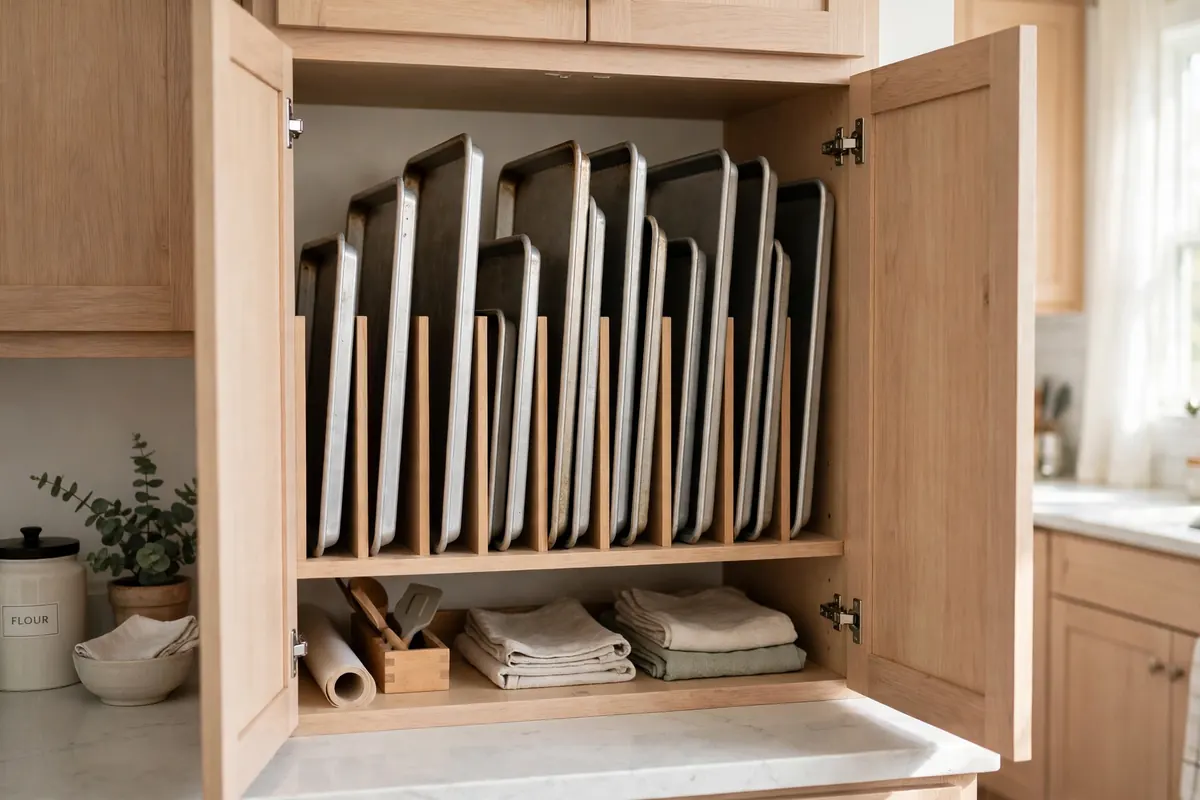
Think about how easy it is to pull a single book off a shelf. You can see its spine, you can grab it without moving the others, and putting it back takes two seconds. That is exactly what vertical filing does for baking sheets. When pans stand upright, side by side, each one is visible and reachable on its own. No lifting a stack. No avalanche. No guessing.
Test the idea before you spend anything: empty the cabinet, wipe the shelf, and stand your baking sheets upright in a row against the side wall. Even without a divider, you can see the pan you want and pull it out with one hand. That single change solves most of the daily annoyance.
A row leaning against a wall will eventually slump, so a simple divider keeps each pan in its own slot and the row upright over time.
Before you buy anything, take five minutes to measure. Measure the height, width, and depth of the cabinet, and your tallest pan standing on its long edge. That prevents the most common mistake: buying an organizer half an inch too tall for the shelf above it. Treat this as part of your wider kitchen cabinet organization ideas, so the whole cabinet works together.
Tray Dividers, Tension Rods, and Clever Hacks That Actually Work
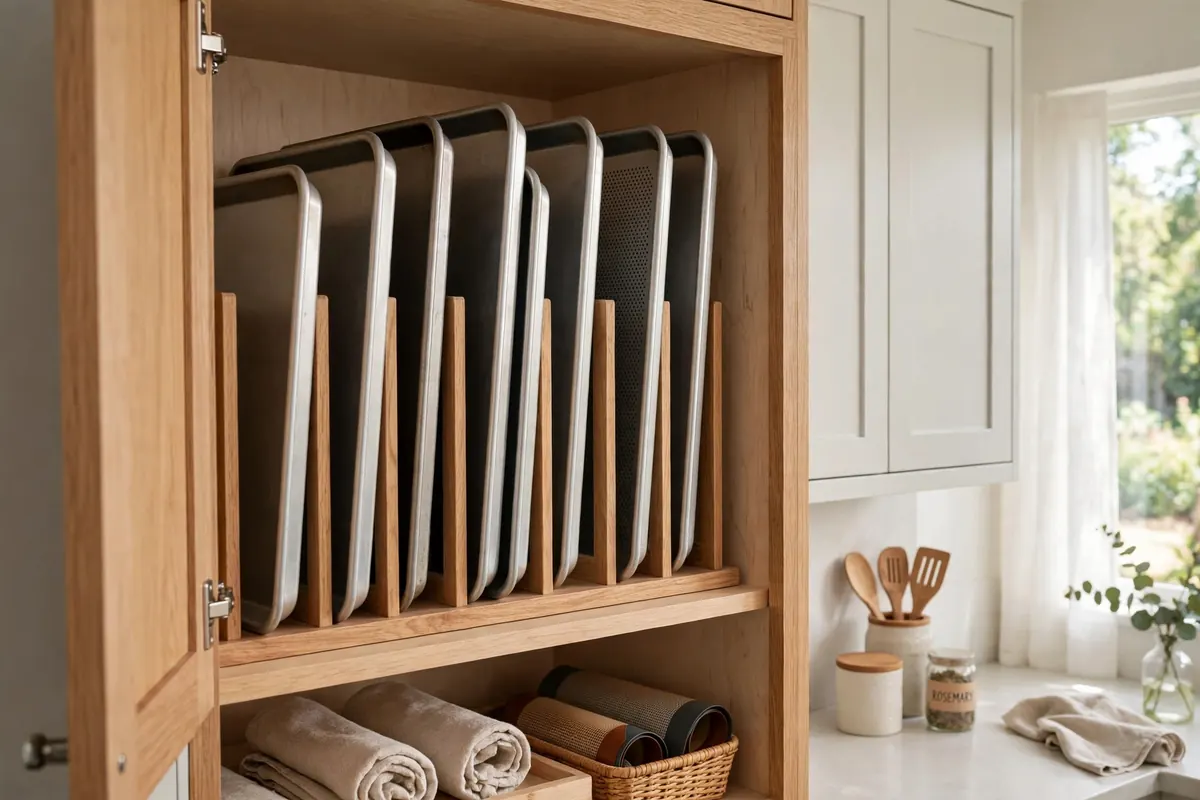
A dedicated vertical tray divider is the simplest upgrade, and it is the one most people end up loving. It is basically a small rack with slots, designed to hold baking sheets, cutting boards, and serving trays upright. Slide it into a cabinet, file your pans into the slots, and you are done. Look for one with adjustable dividers if your collection mixes very thin cookie sheets with thicker roasting pans, because fixed slots can be too narrow for a rimmed pan or too wide to hold a thin sheet steady.
If you do not want to buy a special rack, a few household hacks work surprisingly well:
- Tension rods: Install two or three spring-loaded tension rods vertically inside a cabinet, spaced a few inches apart, to create DIY slots. They cost very little, they need no screws, and you can move them in seconds if your collection changes.
- Bookends: A pair of heavy bookends, or a sturdy magazine holder turned on its side, can hold a small row of pans upright. This works best in a cabinet with a flat, stable shelf.
- Office file sorter: A metal desktop file sorter, the kind meant for folders, fits neatly inside many cabinets and makes perfect slots for baking sheets. Just check the height first, and choose one with a solid base so it does not tip when you pull a pan out.
- Upright pan rack: A purpose-built pan rack with vertical slots does the same job with a neater finish, and it is worth it if you have five or more pans to file.
Whichever option you choose, file pans by frequency: the everyday half-sheet pan in the front slot, holiday-only specialty pans at the back.
Where to Put Cooling Racks, Muffin Tins, and Pizza Stones
Baking sheets are only half the story. The real cabinet chaos usually comes from everything stored alongside them, because cooling racks, muffin tins, and pizza stones each have their own awkward shape. The trick is to give each type its own home instead of letting them all share one pile.
Wire cooling racks are the easiest to file vertically. They are thin and light, and they slide neatly into the same kind of divider you use for baking sheets. If your divider slots are full, stand the racks together in a tall, narrow container, like a magazine holder, and file that container next to the baking sheets. Kept upright, they stop tangling with each other and with the pans.
Muffin tins are trickier because their cups nest into each other and lock together. If you stack them flat, you will spend a minute prying them apart every time you bake. Instead, file them vertically too, or store them with a sheet of parchment paper between each tin so the cups do not grip. A small divider slot of their own keeps them from sliding around and denting. The same principle that keeps lids from vanishing in a crowded cabinet applies here: flat, loose items need boundaries, which is why the ideas in this guide to pot and lid storage ideas that actually work in real kitchens pair so well with a baking-sheet system.
Pizza stones deserve special treatment. They are heavy, fragile, and they chip if they slide around. Never file one vertically unless the slot holds it snugly and it cannot tip. Most people do best storing it flat on a low shelf with nothing stacked on top, or keeping it in the oven on the lowest rack if it gets used often. Just remember it is there before you preheat for something else.
Keep your most-used baking tools together, too. If parchment paper, silicone mats, and cooling racks live in three cabinets, every baking session becomes a scavenger hunt. One baking zone, even a single cabinet and the drawer above it, makes weeknight cookies feel far less like work.
Pull-Out Organizers and Renter-Friendly, No-Drill Options
If your baking sheets live in a deep lower cabinet, a pull-out organizer can be a genuine game changer. Instead of crouching and reaching into the dark back corner, you pull the whole rack toward you and everything comes into view. Pull-out tray dividers exist specifically for this purpose, with vertical slots mounted on a sliding base. They cost more than a simple rack, but for a deep cabinet they pay for themselves in saved frustration.
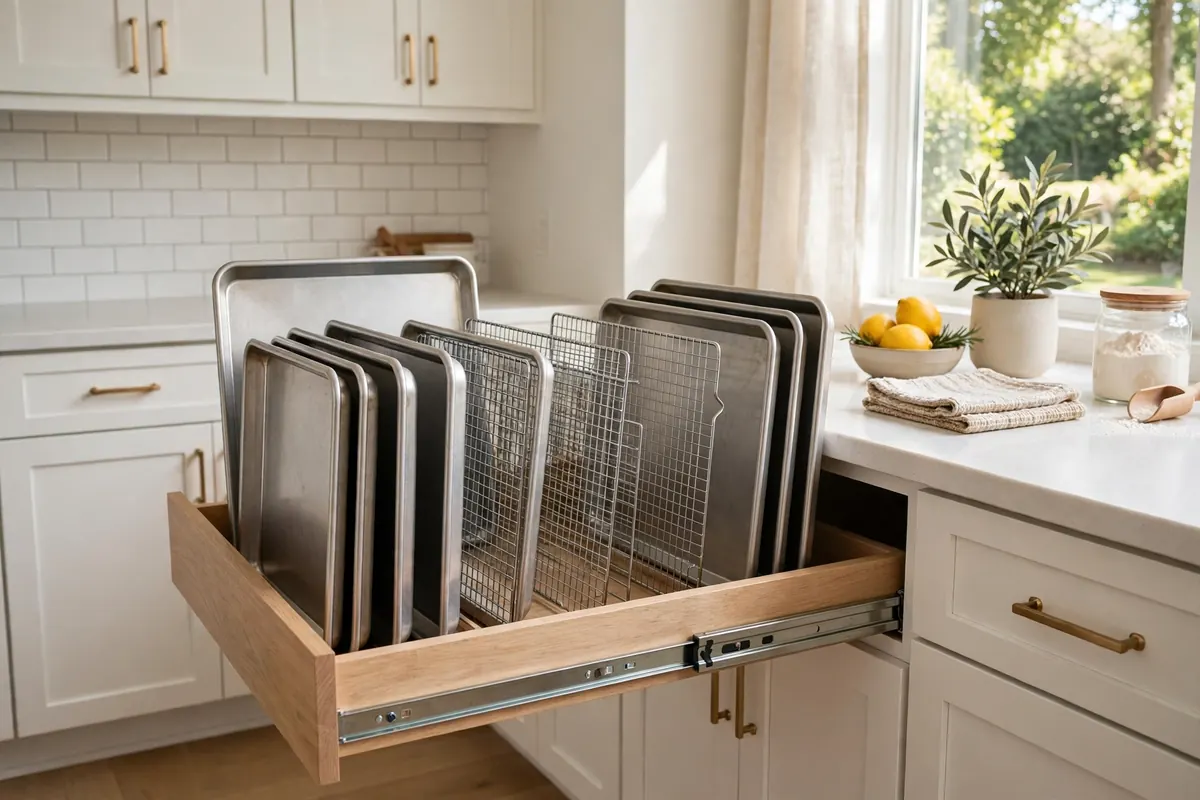
Before you order one, measure twice: the cabinet opening, the interior depth, and the height under the shelf above. A rack that fits the interior but cannot clear the door frame is useless, and a center stile or lip at the opening can catch the slider. For very narrow cabinets, though, a pull-out is often the only way to use the space well. If cutting boards are part of your pile, sort them at the same time with these cutting board organization ideas, so they get a proper slot instead of leaning against the pans.
If you rent, you probably do not want to drill into your cabinets, and you do not have to. Almost every good baking sheet system is completely no-drill. Tension rods, freestanding dividers, file sorters, and magazine holders all sit inside the cabinet without a single screw. They move with you when you move out, and they leave the cabinet exactly as you found it.
Over-the-door racks are another renter-friendly option, provided they hook over a pantry door rather than a heavily used cabinet door. A wire rack inside a pantry door can hold several baking sheets vertically, freeing a whole shelf; add small adhesive felt pads to the hooks if it rattles. Also look at space you already have: the cabinet above the refrigerator suits specialty pans used twice a year, and the drawer under many ovens often fits everyday sheets in a single flat layer.
Protecting Non-Stick Coatings and Keeping the System Working
Once your pans are filed upright, they will last longer, and that matters most for non-stick baking sheets. The coating on a non-stick pan is easily scratched by metal utensils, by other pans sliding across it, and by the constant friction of a stack being pulled apart. Vertical filing removes almost all of that contact. Each pan touches only its divider, not the pan next to it, so the coating stays smooth far longer.
A few small habits help even more. Slide a sheet of parchment paper or a silicone mat between pans if they must share a slot, and never store a sharp metal spatula or a pizza cutter loose in the same space as a non-stick sheet. When you wash your pans, dry them fully before filing them away, because moisture trapped between stacked pans can dull a finish over time. These are tiny steps, but they are the difference between replacing a pan every year and keeping it for a decade.
Keeping the system working comes down to one rule: everything goes back in its own slot, every time. It takes about ten seconds. If a new pan arrives, it earns a slot, or an old pan leaves. That one-in, one-out rule stops the slow creep that fills cabinets, and the same discipline that tames a junk drawer, described in these kitchen drawer organization ideas that end the junk drawer chaos, keeps a baking cabinet tidy for the long run.
Finally, do a quick reset twice a year: pull everything out, wipe the shelf, check for warped pans or damaged coatings, and re-file only what you actually use. A cabinet that holds only what you use stays organized almost by itself.
You do not need a bigger kitchen or an expensive system to end the avalanche. You need a row of upright pans, a simple divider, and a home for the cooling racks and muffin tins that used to pile on top. Measure first, file instead of stack, protect your non-stick coatings, and give every pan its own slot. Do that once, and the next time you reach for a baking sheet, the only sound you will hear is the quiet slide of exactly the pan you wanted.