
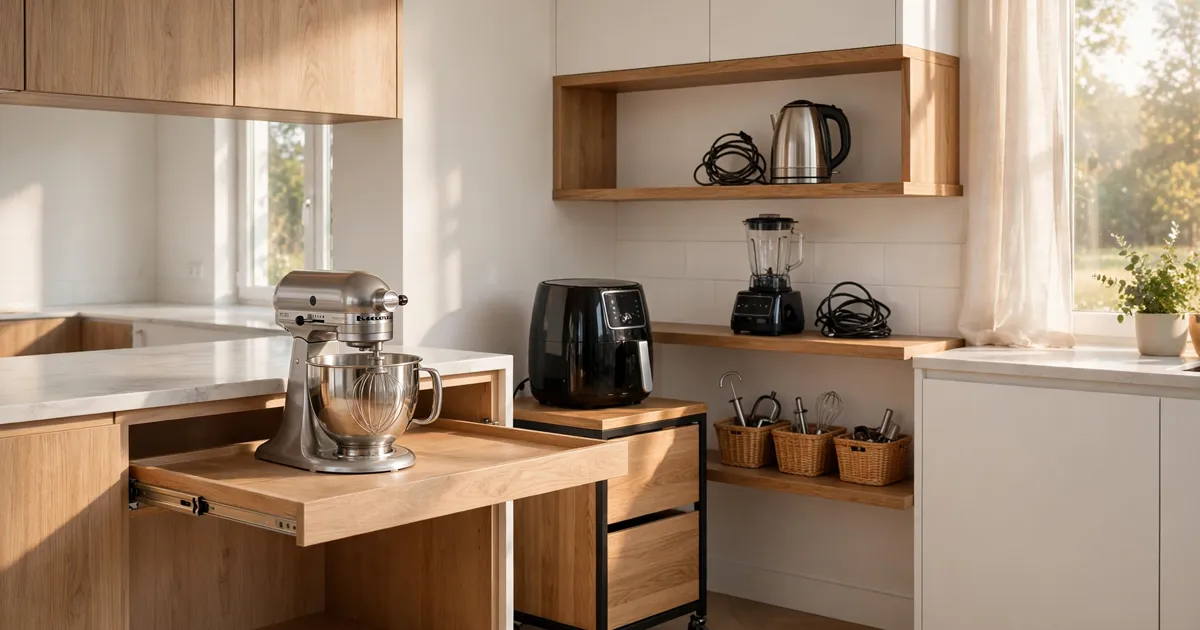

I counted mine on a Tuesday morning, standing in the middle of my kitchen with a mug of coffee going cold in my hand: the air fryer wedged between the toaster and the fruit bowl, the stand mixer somehow living on top of the fridge (how it got up there, I honestly don’t remember), the blender hiding behind the bread box, and the slow cooker exiled to the laundry room. Seven small appliances. Four feet of usable counter space. If your kitchen is starting to feel more like a crowded electronics showroom than a place where dinner actually gets made, these small appliance storage ideas are exactly what you need.
Here’s the thing nobody tells you when you buy your first air fryer: the appliance isn’t the hard part — finding it a home is. Small appliances are one of the fastest-growing sources of kitchen clutter: bulky, oddly shaped, each arriving with a cord that tangles itself overnight, and every one demanding its own patch of countertop. The good news? You don’t need a bigger kitchen or an expensive remodel. You need a plan, and it starts with being honest about what you actually use.
Which Appliances Actually Earn a Spot on Your Counter?
Before we move a single gadget, let’s agree on one rule: not everything needs to be visible. A friend of mine kept a waffle maker on her counter for three years. In those three years, she used it twice — both times when guests were visiting and she felt she had to justify its existence. Meanwhile, she made toast every single morning while performing an awkward sideways shuffle around it. That waffle maker was not a kitchen tool. It was a monument.
The fix is a simple use-frequency test. Walk through your kitchen and sort every small appliance into three groups: daily use (the coffee maker, the toaster — things you touch almost every morning), weekly use (the air fryer, the blender, the hand mixer — regulars, but not every day), and monthly or seasonal (the slow cooker, the stand mixer, the food processor, the waffle maker). Daily-use appliances earn counter space. Weekly-use appliances deserve a nearby, easy-access home. Monthly-use appliances can live deeper in storage without any guilt at all.
- Daily use: keeps its counter spot, no questions asked.
- Weekly use: gets a dedicated cabinet, shelf, or cart within arm’s reach.
- Monthly or seasonal: moves to higher shelves, the pantry, or a closet — somewhere out of the daily traffic lane.
Be ruthless but realistic. If you tell yourself you’ll start using the bread machine “one of these days” but haven’t touched it since 2023, it’s a monthly-use appliance at best — and maybe it’s a donation-box appliance. This honest sort is the foundation of every other idea below, and it pairs perfectly with a full kitchen counter organization reset so your counters stay clear for actual cooking.
Small Appliance Storage Ideas for Heavy Machines Like Stand Mixers
A stand mixer is a beautiful object and an absolute beast to move. For the first year I owned mine, I lifted it with both hands, groaning and banging it against the cabinet frame, swearing I’d use it more if it were easier to get out. The day I stopped lifting it entirely, the problem disappeared.
The best solution for heavy machines is a pull-out sliding shelf in a lower cabinet — it brings the mixer out to you, so there’s no digging into a dark cabinet and hauling it up and out. You slide the shelf forward, mix your dough, and slide it back. Just make sure the hardware is rated for the weight; a mixer plus a full bowl of bread dough is no joke. If a built-in shelf feels like too much, a rolling appliance caddy does the same job: the machine sits on a low-profile wheeled tray, and you glide it to the counter edge when you need it, then tuck it back.
- Stand mixer: pull-out shelf in a lower cabinet, or a sliding tray under the uppers.
- Slow cooker: store low — a bottom cabinet or a sideboard. Never above the cabinets (you’ll stop using it the week you need a step stool), and when it’s cooking day, set it up on the stovetop or a heat-safe surface.
- Food processor: keep the base in a deep drawer or cabinet and the blades in a small basket right beside it, so the whole setup travels as one unit.
- Blender: if you use it for morning smoothies, it earns a permanent counter corner; otherwise it goes in a cabinet near the glasses.
The pattern here is simple: heavy things live low, and heavy things you use often live on something that moves. Your back will thank you, and you’ll actually use the machines you paid good money for. For more on making every cabinet earn its keep, see these kitchen cabinet organization ideas.
Where to Put the Air Fryer (It’s Fussier Than You Think)
The air fryer is the most demanding roommate in my kitchen. Even a small one-drawer model swallows a shocking amount of counter, and you need clearance in front for the drawer to slide all the way out. Then there’s the placement fussiness: air fryers vent heat and steam, so parking one directly under your wall cabinets will damage them over time. Keep it clear of the sink (water and hot electronics are a bad combination), away from anything flammable like curtains, and with space around the vents so air can circulate.
The sweet spot is a clear, stable surface against the back wall where you can pull the fryer forward while it’s running and cooling down, then push it back when you’re done. If counter space is truly scarce, give it a home on a rolling cart, a sturdy pantry shelf, or its own counter corner with the cord neatly wrapped. And before you buy — or reorganize around the one you have — measure. Know the footprint, the drawer clearance, and the nearest outlet. Five minutes with a tape measure saves months of daily annoyance.
- Never run it directly under wall cabinets — steam damages them over time.
- Keep it away from the sink and water sources.
- Leave room around the vents and space in front for the drawer.
- Wrap the cord before storing, or it will tangle with everything nearby.
If your whole kitchen is on the snug side, these ideas work beautifully alongside a broader small kitchen organization plan — the goal is the same: every inch working, nothing wasted.
Turn Forgotten Corners Into Working Appliance Storage
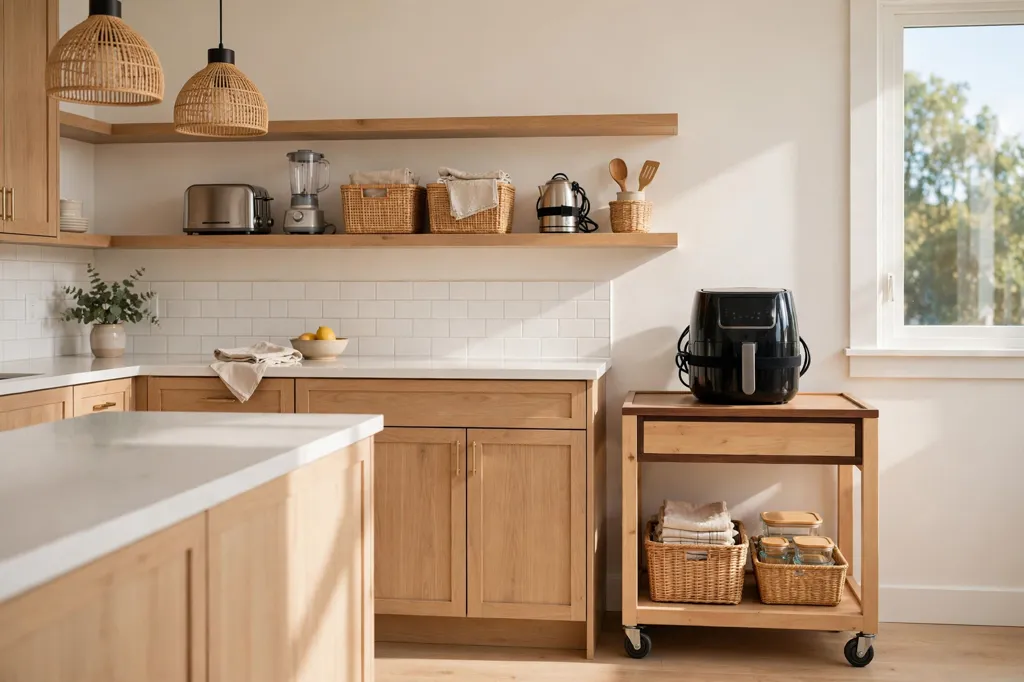
Every kitchen has dead zones: the deep corner cabinet where things go to disappear, the stretch of wall above the counter that holds nothing but a lonely clock, the gap between the fridge and the wall. With the right setup, these forgotten spaces become some of the best appliance homes in the house.
Deep drawers are the unsung heroes here — perfect for awkwardly shaped gadgets that refuse to stack in cabinets. Lay everything out horizontally, add dividers so nothing rolls around, and you can see your whole inventory at a glance. For more ideas, see this guide to kitchen drawer organization.
That dead corner cabinet? Fit it with a rotating tray and let it hold the bulky machines you use least — the bread maker, the ice cream churn, the slow cooker you only touch in winter. Rarely used things can live in awkward spots, because you won’t mind the stretch once a month. Open shelves work the other way: mount a couple of sturdy ones for lightweight daily items like the kettle or a small blender, keep the layout airy (packed shelves read as clutter), and tuck loose attachments into small baskets so lids and blades never wander off.
- Rolling kitchen cart: park the Instant Pot or air fryer on the shelves, wheel it to the stove while cooking, then roll it against the wall or into a closet. Locking wheels are non-negotiable.
- Baker’s rack with a power outlet: doubles as a dedicated appliance station — plug the microwave, coffee maker, or air fryer straight into the shelf and free your main counters entirely.
- Repurposed hutch or armoire: a freestanding piece in or near the kitchen hides small appliances behind doors while keeping them steps away. Look for cord cutouts on the back panel.
The Appliance Garage: One of the Smartest Small Appliance Storage Ideas
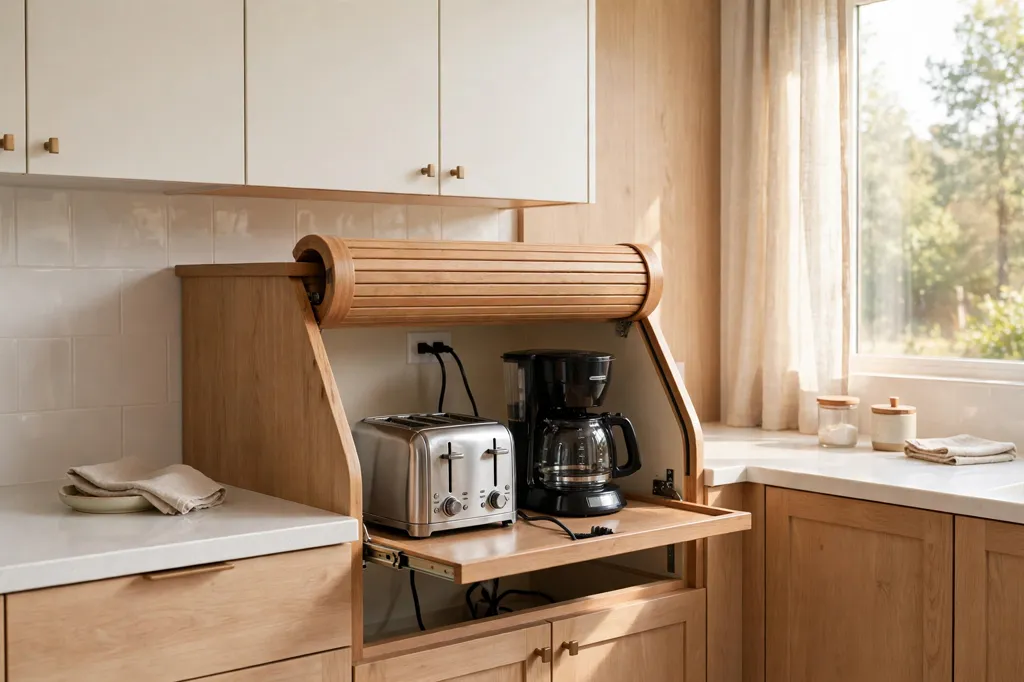
An appliance garage is a little enclosed box on your countertop with a door that opens and closes. The toaster and coffee maker live inside, plugged in and ready — you make your coffee, slide the door down, and the visual clutter vanishes. It’s perfect for the in-between appliances: used too often to haul to a cabinet every morning, but crowded-looking when they sit out all day.
A few design details make all the difference. Plug sockets inside the garage mean you never lift the appliance out to use it. A pull-out shelf lets you slide the toaster forward for easy access. And pocket or folding doors disappear while the garage is open, so you’re not fighting a swinging door in a tight kitchen. Buy a ready-made cabinet or DIY one from a wall cabinet box — either way, you get that magical hotel-kitchen feeling of counters that are somehow always clear.
Cords, Accessories, and 5 Mistakes That Make Clutter Worse
Here’s a confession: half of my appliance clutter was never the appliances. It was the cords — snaking across the counter, tangling in drawers, catching on shelf edges every time I pulled the mixer out. The fix is almost embarrassingly cheap: small adhesive cord organizers that stick to the side or back of each machine. Wrap the cord, snap it in place, and the appliance suddenly takes up half the visual space. Do it before anything goes back into a cabinet.
Accessories deserve the same discipline: store lids, blades, and attachments with their appliance, in a small basket or bag kept in the same cabinet or drawer. If the parts don’t travel together, the appliance might as well not exist.
And now, the five mistakes that quietly make appliance clutter worse:
- Storing things above the cabinets. That dusty gap between the cabinet tops and the ceiling is where appliances go to be forgotten. If you need a ladder, you won’t use it.
- Buying before measuring. The number-one cause of “it doesn’t fit anywhere” syndrome. Measure the space, the appliance, and the outlet distance before anything comes home.
- Keeping duplicates. Two blenders, three coffee makers, a hand mixer and a stand mixer that do the same job. Pick the winner; let the other go.
- Guilt-keeping gifts. The fondue set from your aunt, the juicer from a well-meaning friend. You are allowed to donate a gift you never use. The love was in the giving, not the storing.
- No landing zone. Appliances migrate to the counter because they have nowhere else to belong. Every machine needs a named home — a shelf, a drawer, a cart — or it will always end up back on the counter.
A little seasonal honesty helps too: once or twice a year, pull everything out and re-run the use-frequency test from the top of this article. Tastes change, routines change, and the bread machine you swore you’d use might finally be ready for a new home.
You don’t need fewer appliances — you need a better system for them. Start with the honest sort, give the heavy machines a shelf that moves, find your air fryer a ventilated home, and tame every last cord. Do that, and the next time you stand in your kitchen with a mug of coffee, you’ll see clear counters, an open stretch of workspace, and exactly the tools you need, exactly where you need them. That’s not just an organized kitchen. That’s a kitchen that makes you want to cook.
[…] you use weekly. Speaking of which, if your small appliances are colonizing the countertop, our small appliance storage ideas will help you give each one a real home inside the cabinets […]
[…] If your counters are as short as most tiny kitchens’, you already know how valuable these little small appliance storage and cabinet solutions can be — the same techniques that make a tiny kitchen function also tame […]