
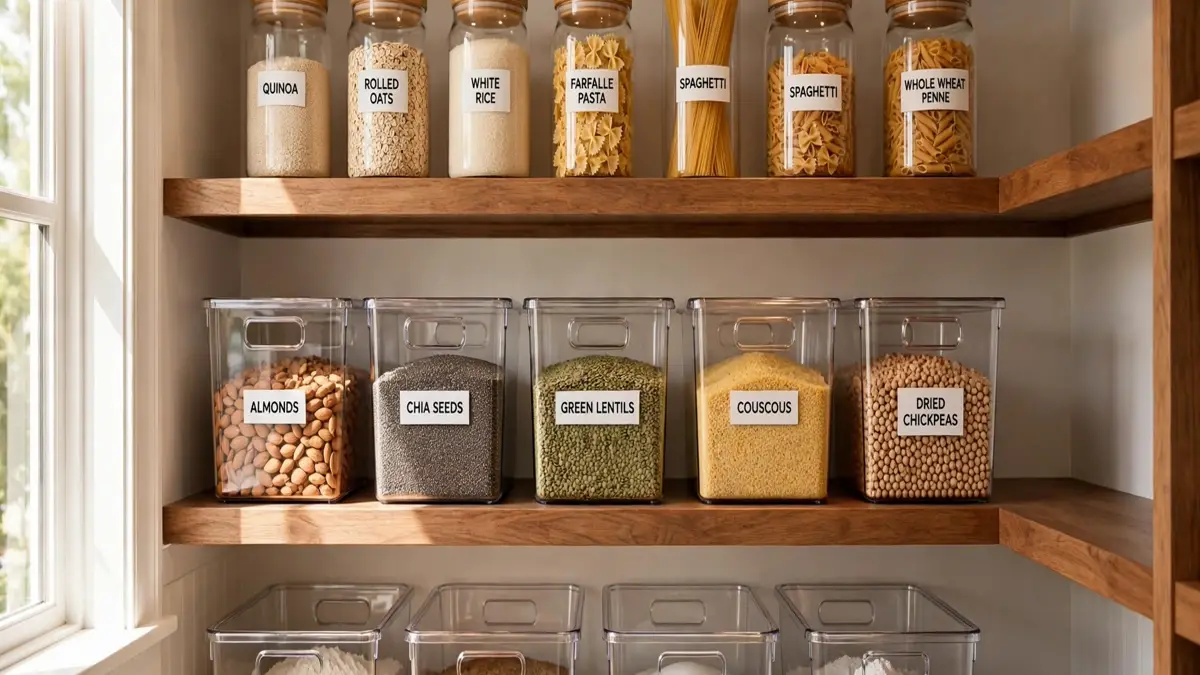

Every deep pantry has the same secret: the back row. You know the spot — the last eight inches of a 24-inch shelf where good food goes to be quietly forgotten. I once helped a friend reorganize her pantry and we found three jars of the same pasta sauce, two of them expired, plus a box of stuffing mix from a Thanksgiving nobody in the house could remember. If you have ever re-bought something you already owned, you do not need a lecture on discipline. You need deep pantry shelf organization ideas built for shelves your arm was never meant to reach.
Here is the honest truth: most pantry advice is written for shallow, 12-inch shelves. Deep shelves are a different animal, and organizing them with shallow-shelf tricks is like bailing out a boat with a colander. The fixes that actually last on deep shelves do one of three things: they bring the back forward to you, they raise the back so you can see it, or they reserve the back for things you only need occasionally. Every idea below falls into one of those buckets.
The Real Reason Your Deep Shelves Keep Beating You
Stand in front of your pantry and stretch your arm straight back along a shelf. Most adults can comfortably reach about 18 to 20 inches. Many builder-grade pantry shelves run 20 to 24 inches deep, and walk-in pantries often stretch to 28. That gap between your reach and the back wall is where organization goes to die.
When you cannot comfortably reach an item, two things happen. First, you shove it there with purpose but retrieve it with reluctance — grabbing the front-row items day after day while the back row fades from memory. Second, restocking becomes a game of tetris: new groceries get jammed into the front because that is where your hands naturally go, burying the older items behind them. Within a month, you own five cans of black beans and zero awareness of it.
Standard advice like “decant everything into matching jars” does not fix this, because the problem is not uniformity — it is access. A perfectly uniform jar you cannot reach is still a jar you will forget.
The Pull-Forward Bin Method: Turn Every Shelf Into a Drawer
The single highest-impact change you can make to a deep pantry is also the simplest: stop placing loose items on deep shelves. Group everything into long bins with handles that slide forward like drawers. This is the pull-forward method, and it is the closest thing deep pantries have to a magic trick.
Here is how to set it up. Measure the depth of your shelves first — bins that run the full shelf depth work best, because any unused inches behind the bin become a new graveyard. Choose bins with low fronts or cut-out handles so you can see and grab the contents without lifting the whole thing out. Then assign each bin a category and treat the front half of the bin as your active zone and the back half as your reserve zone.
- Breakfast bin: cereal boxes, oatmeal packets, pancake mix, syrup. Front: the cereal your family actually eats daily. Back: unopened backup boxes.
- Dinner bin: pasta, rice, jarred sauce, broth cartons, canned tomatoes. Front: this week’s meal plan. Back: extras.
- Baking bin: flour, sugar, baking powder, cocoa, chocolate chips — everything a baker reaches for on a Saturday afternoon.
- Snack bin: granola bars, crackers, chips, popcorn. Give kids their own labeled bin they can pull out themselves.
- Backstock bin: the duplicates and bulk extras that used to vanish into the dark — one clearly labeled backstock bin per category.
The beautiful thing about bins is that they make first-in-first-out rotation nearly automatic. Pull the bin forward, put new items at the back, slide older ones to the front — ten extra seconds that ends the era of buying your sixth can of chickpeas. Label the front of each bin, because a bin without a label becomes a junk drawer within a month. And keep bins light enough to slide easily when full — a bin you have to wrestle with is a bin you will stop using by week three.
Deep Pantry Shelf Organization Ideas for the Back Row
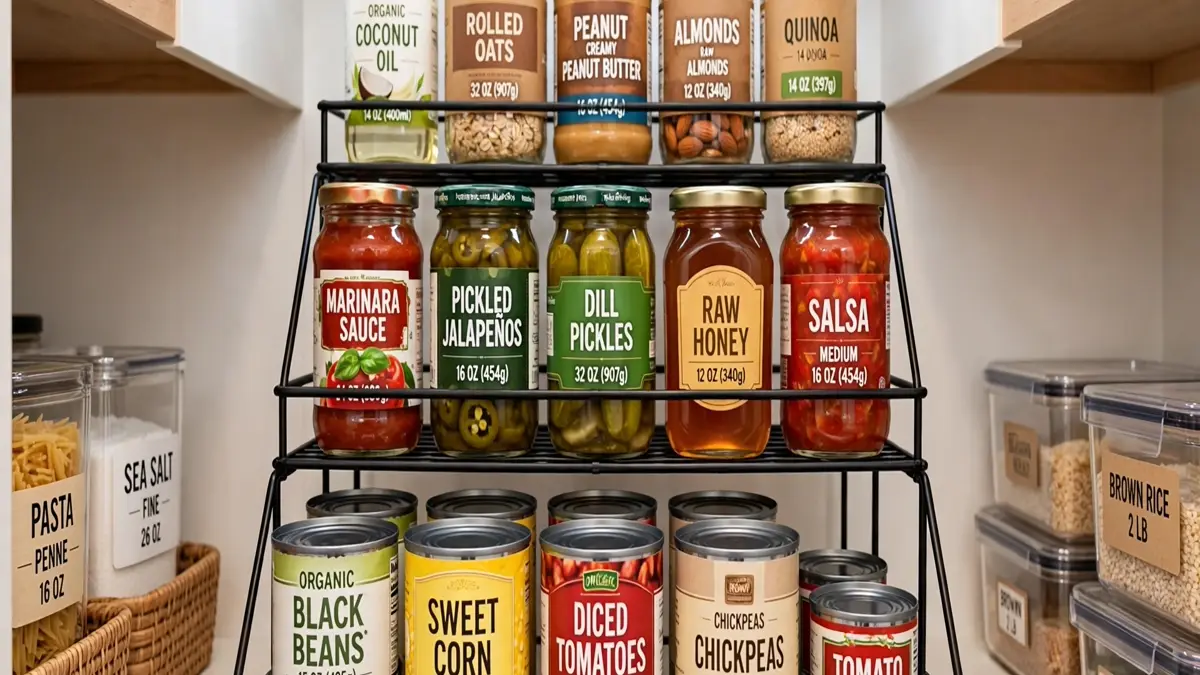
Even with bins doing the heavy lifting, some things belong out on the open shelf — and that is where visibility tricks come in. The goal is simple: every item on a deep shelf should be readable from the doorway without moving anything in front of it. The best tool for this is the tiered riser, sometimes sold as a spice rack or can organizer, which works exactly like stadium seating. Short items sit in the front row, taller items behind them, so no label hides behind another.
Canned goods are the classic deep-shelf problem, and risers solve them completely. Line your cans on a three-tier riser and suddenly the back row becomes the top row, fully visible. Arrange by category within the tiers: soups together, beans together, vegetables together, oldest cans pulled to the front. This is also the moment to be honest about your can collection — pull out the ones you will never cook with, donate the in-date ones, and let your risers hold only food you will actually reach for. For a deeper dive on giving cans their own reliable system, these canned food organization ideas pair beautifully with everything in this guide.
For jars and bottles, the same stadium principle applies: short jars in front, tall bottles in back, and never more than two rows of anything without a riser between them. If your shelf has serious height, add a freestanding under-shelf riser to recover the dead air above short jars — tea boxes, spice tins, small packets. One more visibility trick that costs almost nothing: a narrow strip of adhesive LED motion-sensor light under the front edge of each shelf. Deep pantries are often dim, and half the “I can’t find anything” problem is literally darkness.
Turntables, Lights, and the Middle Zone You Keep Forgetting
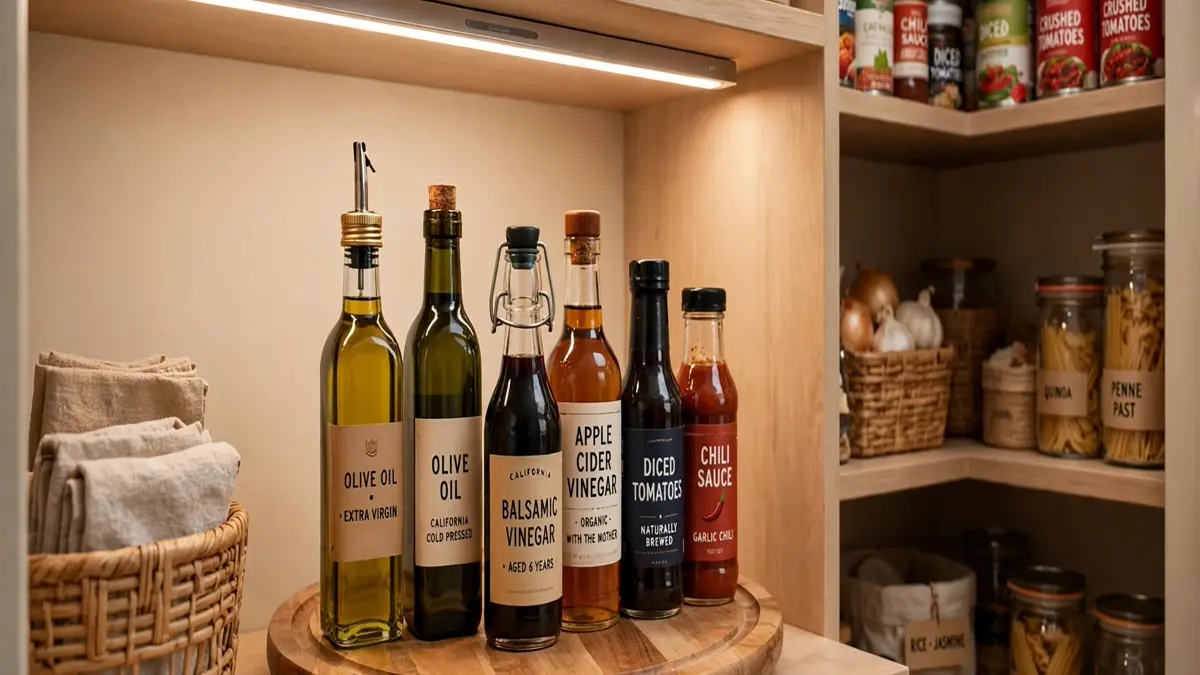
Deep shelves have three zones, but most people only think about two: the front and the back. The middle zone — that stretch between about 8 and 16 inches deep — is where bottles and jars go to stand in traffic jams. The tool built exactly for this zone is the turntable, better known as the lazy susan.
Place a turntable in the middle of a deep shelf and it becomes a rotating station for the round bottles that otherwise cause chaos: cooking oils, vinegars, soy sauce, salad dressings, hot sauces. Give it a slow spin and the bottle you need comes to you. A 12-inch turntable fits most shelves, and a rimmed or non-slip one keeps tall bottles from tipping during the spin. Keep the turntable’s contents to one theme per shelf: oils and vinegars on one, sauces and condiments on another.
- Size it to the shelf: leave two inches of clearance on each side so it spins freely.
- Rimmed beats flat: a raised lip catches bottles before they walk off the edge.
- Two-tier for tall bottles: olive oil below, finishing oils and vinegars above.
- Keep it theme-tight: one turntable per category. A mixed turntable of oil, honey, and soy sauce becomes a lazy susan of confusion.
Spices deserve special mention here, because they are small, numerous, and the most-forgotten residents of deep pantries. A small turntable on a middle shelf keeps every jar one spin away, and it is one of the rare cases where a dedicated organizer genuinely beats a bin. If your spice situation has outgrown a single turntable, these spice organization ideas will take you the rest of the way. And remember the lighting trick from the last section — a motion-sensor light above your turntable shelf turns a dim middle zone into a display you actually enjoy using.
The One-Item-Deep Rule for Floppy Categories
Some pantry categories simply do not survive being stored more than one item deep. Sauce pouches, spice packets, gravy mixes, taco seasoning envelopes, snack bags, tea sachets — anything soft, floppy, or irregularly shaped collapses into a drift of packaging the moment you stack it two deep. A second row of these items behind the first will be forgotten. Guaranteed.
The fix is the one-item-deep rule: floppy categories get a single visible row, period. Store them in a shallow tray or a low basket at the very front of the shelf so every packet is visible at a glance. When the tray is full, you stop buying — the tray itself becomes your inventory limit, which quietly curbs the overbuying that deep pantries encourage. Keep your backup supply for these categories in a labeled backstock bin on a different shelf, clearly marked so you remember it exists. When the front tray runs low, you refill from backstock instead of shopping blind.
This is also where decanting earns its keep. The floppy categories that cause the most trouble are often bulk bags: rice, pasta, flour, sugar, cereal, coffee. Pouring them into airtight containers transforms them into stackable, visible, one-item-deep soldiers — and write the expiration date from the original bag on the bottom of the container before you toss the packaging. If you love a Saturday bake day, big clear canisters make measuring feel like a pleasure instead of an excavation — and this baking supplies organization guide shows how to zone the whole baking area around them. If your family’s snack chaos has outgrown the pantry entirely, this kids’ snack station organization guide builds a dedicated system for it.
The 20-Minute Sweep That Keeps It All Working
Every pantry system fails at the same point: maintenance. Not the big annual cleanout — the small weekly habits that keep the back row honest. The good news is that deep-shelf maintenance is fast once the system is built, because you are no longer excavating; you are just gliding bins forward and glancing at rows.
Set a recurring 20-minute slot once a month — Sunday morning with coffee works for most people — and run the same sweep every time:
- Pull every bin forward and look at the back half. Anything expired or stale goes straight to the trash or compost. This is your graveyard prevention.
- Rotate for freshness: move existing items to the front of each bin and place new groceries behind them. First in, first out, every time.
- Read the back row: scan your risers and turntables for duplicates. Two open jars of the same sauce means one needs to get used this week — plan a meal around it.
- Wipe as you go: a damp cloth over the shelf while the bins are pulled out takes two minutes and keeps crumbs and sticky rings from building up.
- Check the backstock bin: if it is overflowing, that is a signal to pause buying in that category. If it is empty, add the empties to your shopping list. If you buy pantry staples in bulk, size that backstock so it serves you instead of swallowing shelf space.
Twenty minutes, once a month, and your deep pantry never needs another full-day overhaul. If one zone keeps sliding back into chaos between sweeps, that is useful information — it means that specific zone needs a tweak, not that the whole system failed. Adjust the zone, keep the system.
Deep shelves are not the enemy. They are generous, roomy, wonderful storage — they just need to be organized on their own terms, with bins that bring the back forward, risers that lift it into view, turntables that spin the middle within reach, and a monthly sweep that keeps every row honest. Start with the pull-forward bins this weekend — they take an afternoon and change the pantry overnight. Add the risers and the lighting next. Within a month, the back row will stop being a secret and start being the best-organized part of your kitchen. And the next time someone asks if you have pasta sauce, you will know the answer without moving a single can.
[…] back comes to you. If your pantry shelves run uncomfortably deep, the strategies in our guide to deep pantry shelf organization pair perfectly with what you are doing […]
[…] everything in its zone. The food you stop throwing away pays for the whole project within months. Our deep pantry shelf guide applies the same principles to extra-deep shelves that swallow […]