


You know the exact moment I’m talking about. You’re halfway through a cookie recipe — butter already creaming in the bowl — when you discover the bag of brown sugar has hardened into a brick, the baking powder expired sometime last year, and there is a tub of cream of tartar in the back of the cabinet that you bought for exactly one meringue, years ago. Baking is supposed to feel like a treat. But without a little baking supplies organization, it feels like an excavation.
I spent years doing the recipe-shuffle: pulling half-empty bags and mystery jars out of three different cabinets, knocking a lidless canister of flour across the counter, and buying my third bottle of vanilla extract because I could never find the other two. Then one rainy Saturday I pulled everything out — every last sprinkle — and built an actual system. The baking itself didn’t change. But the part before the baking, the gathering and the finding and the wondering what’s still good, went from chaos to calm. Here’s exactly how to do the same, whether you have a walk-in pantry or a single tired cabinet above the microwave.
Why Baking Supplies Organization Is Worth One Afternoon
Baking ingredients are sneaky. Unlike pasta or canned beans, they arrive in a wild mix of shapes and sizes — floppy bags of flour, tall boxes of cake mix, tiny vials of extract, wide tubs of shortening — and then they migrate. The flour lives in the pantry, the cocoa powder ended up in the cabinet over the stove, the muffin tin is wedged somewhere behind the slow cooker. Every time you bake, you pay a quiet tax in hunting, digging, and second-guessing.
A proper system pays you back on every single bake:
- You stop buying duplicates. The three half-used bags of powdered sugar finally become one full jar.
- You actually use things before they expire. Baking powder that went flat in 2023 stops haunting your biscuits — because you can see what you have.
- Recipes go faster. When every ingredient sits in one spot, you can gather a whole recipe in under a minute.
- Cleanup gets easier. Everything has a home to go back to, so the post-baking kitchen resets itself.
You don’t need a farmhouse pantry or a matching set of expensive jars. You need zones, a honest clear-out, and a few habits. Let’s build it.
Step One: The Honest Declutter Pass
Take everything baking-related out of every cabinet, drawer, and shelf, and line it up on the counter. All of it — the flours, the sugars, the extracts, the sprinkles from your kid’s birthday two years ago, the random tin of golden syrup. This is the only part that feels like work, and it takes about thirty minutes. Put on a podcast. It goes faster than you’d think.
Now sort into three piles:
- Keep and use. Everyday flours, sugars, leaveners, oils, extracts, chocolate chips, nuts, and the tools you reach for weekly.
- Keep for the season. Gingerbread spices, holiday sprinkles, candy melts, the snowflake cookie cutters. They stay — but they don’t get prime real estate (more on that later).
- Toss or donate. Anything expired or stale, anything you’ll never use again. Unopened extras you don’t need? Donate them to a food bank.
Be honest about freshness, because baking is chemistry. Baking powder and baking soda lose their lift after about six months once opened — test old baking powder with a spoonful of hot water; if it doesn’t fizz eagerly, it’s done. Ground spices fade after about a year (rub a pinch between your fingers — if there’s barely any smell, replace it). Old flour smells musty or soapy when it’s past its prime.
Then comes the equipment audit, which is where most of us find our ghosts. The donut pan used once. The madeleine tray from a hobby phase. The bread machine. If you haven’t touched it in a year and it doesn’t spark real excitement, let it go — donate it to someone who’ll use it. What stays should be things you genuinely bake with. A leaner collection is a more usable collection.
Set Up a Baking Zone: Everything Within Arm’s Reach
Here is the single biggest upgrade you can make: keep everything in one place. One cabinet section, one pantry shelf block, or one deep drawer paired with a shelf. The moment your baking life lives in one zone, the hunting stops.
Pick the spot closest to where you actually mix — the stretch of counter near an outlet, so the mixer doesn’t have to travel. If you bake in a small kitchen, your zone might be one lower cabinet plus the shelf directly above it. That’s plenty. What matters is that the zone is dedicated and everything in it belongs there.
Inside the zone, arrange by weight and frequency:
- Low or middle shelves: the heavyweights — flour, sugar, big bags of chocolate chips. Your back will thank you.
- Eye level: the everyday players — baking powder, baking soda, salt, vanilla, cocoa powder. The things your hands grab in every recipe.
- Together on a small tray or turntable: the tiny stuff — extracts, food coloring, cream of tartar, yeast packets. A lazy Susan keeps these spin-and-grab accessible instead of buried.
- Top of the zone (or a clearly marked box): seasonal and specialty items. They stay in the family but out of the way until their moment arrives.
A shelf label that says “baking” does quiet magic — it reminds the whole household that this spot is spoken for, and it keeps the zone from slowly filling up with stray cereal boxes.
One more zone trick: keep a small caddy or basket inside the zone with your measuring cups, spoons, a whisk, and a spatula. When you start baking, you lift the whole caddy out. When you’re done, it goes back. No more opening four drawers to find a teaspoon.
Decant, Label, and Date: The Ingredient System
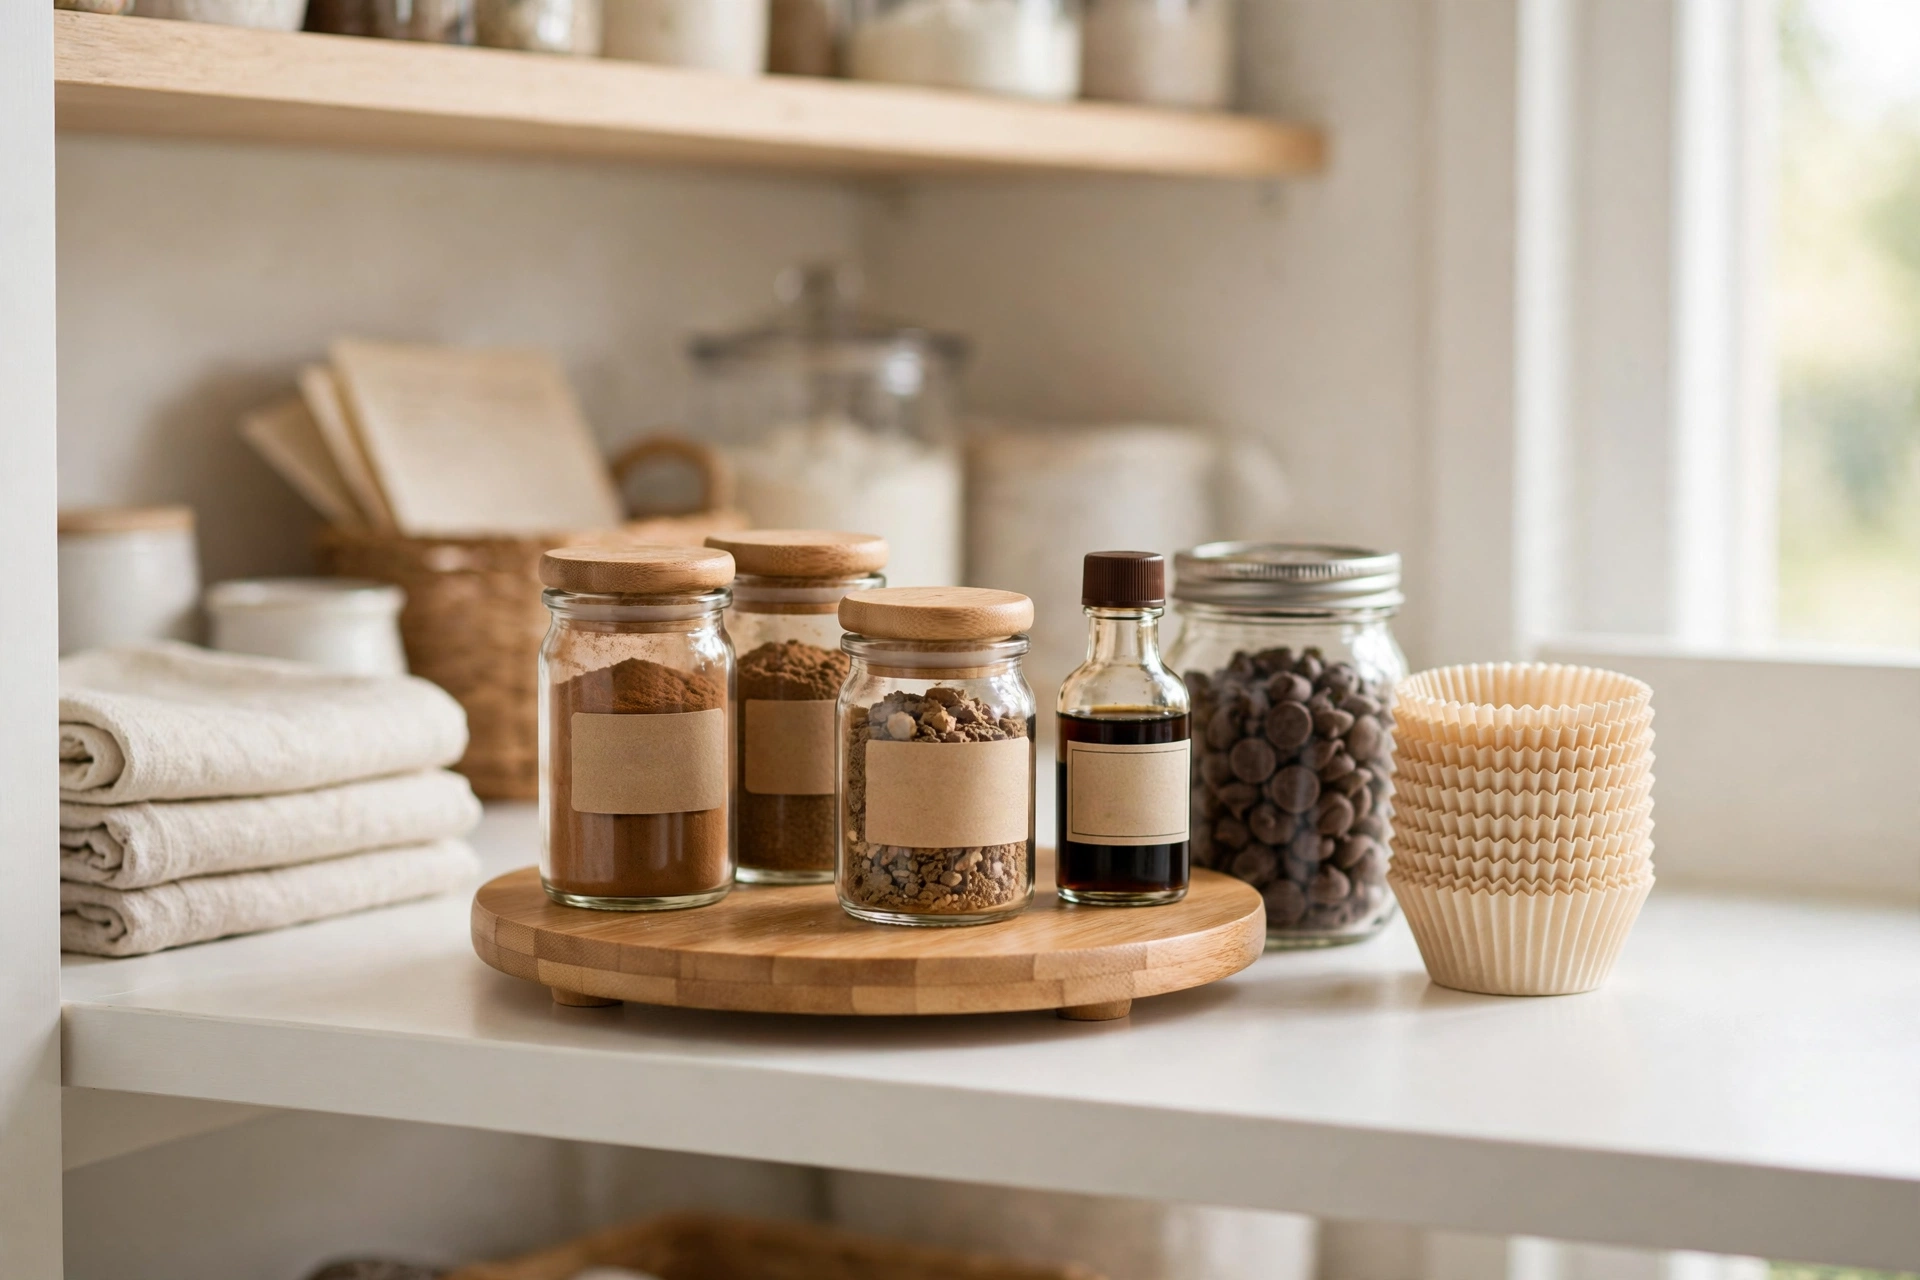
Floppy bags are the enemy of an organized pantry. They tear, they spill, they can’t be stacked, and you can never tell how much is left. Transfer your core dry goods into airtight containers — flour, granulated sugar, brown sugar, powdered sugar, cocoa powder, oats, chocolate chips, and baking mixes. Airtight matters: it keeps flour fresh, keeps brown sugar soft, and keeps pantry moths out of your life.
You don’t need a matching designer set. What helps most:
- Square or rectangular containers waste less shelf space than round ones.
- Wide mouths let you scoop and level with a measuring cup right in the jar — a small daily joy.
- Clear bodies show levels at a glance, so you notice the flour running low before bake day.
- One size family (same brand, a few sizes) stacks neatly and looks calm. If you’re building the system from scratch, our guide to decanting and labeling your pantry walks through container choices in detail, and our food storage container organization guide covers sizing for every shelf.
Label everything, even the obvious stuff. Six months from now, plain white powder could be flour, powdered sugar, or baking soda — and guessing wrong ruins a cake. A simple label with the contents plus the date you opened it takes ten seconds and saves real heartbreak. If you want to be extra kind to your future self, tape the original package’s storage notes or a strip of the recipe’s key ratio to the bottom of the jar.
For baking spices, steal a trick from the main spice drawer: keep cinnamon, nutmeg, ginger, cloves, and cardamom together in a small cluster within your baking zone, separate from savory spices. A two-tier step shelf or a small turntable makes every jar visible. Our spice organization ideas post has shelf and drawer layouts that work beautifully for a baking cluster too.
Taming the Odd-Shaped Stuff: Tools, Tins, and Decorating Gear
Ingredients are only half the battle. The real chaos usually comes from the odd-shaped army: cookie cutters, cupcake liners, piping tips, sheet pans, the rolling pin, the cooling racks, the cake decorating kit you bought with big ambitions.
Cookie cutters and liners. One clear box for cutters, sorted loosely by occasion if you like (Christmas, Halloween, everyday shapes). Cupcake liners stand upright in a mason jar or a small clear canister — you can see every pattern, and they stop unrolling themselves into the back of the drawer.
Piping tips, decorating bits, and sprinkles. A small divided craft box or a tackle-style organizer keeps piping tips sorted by size, and sprinkles in their original shakers line up on a narrow shelf or in a small bin. Decorating gear that’s used together should live together — when it’s cupcake night, you grab one box.
Sheet pans, muffin tins, and cooling racks. Store these vertically with file organizers or a vertical divider in a lower cabinet — slide-in, slide-out, no more crashing stacks. If they must stack, put a sheet of parchment or a silicone mat between nonstick pans to protect the coating.
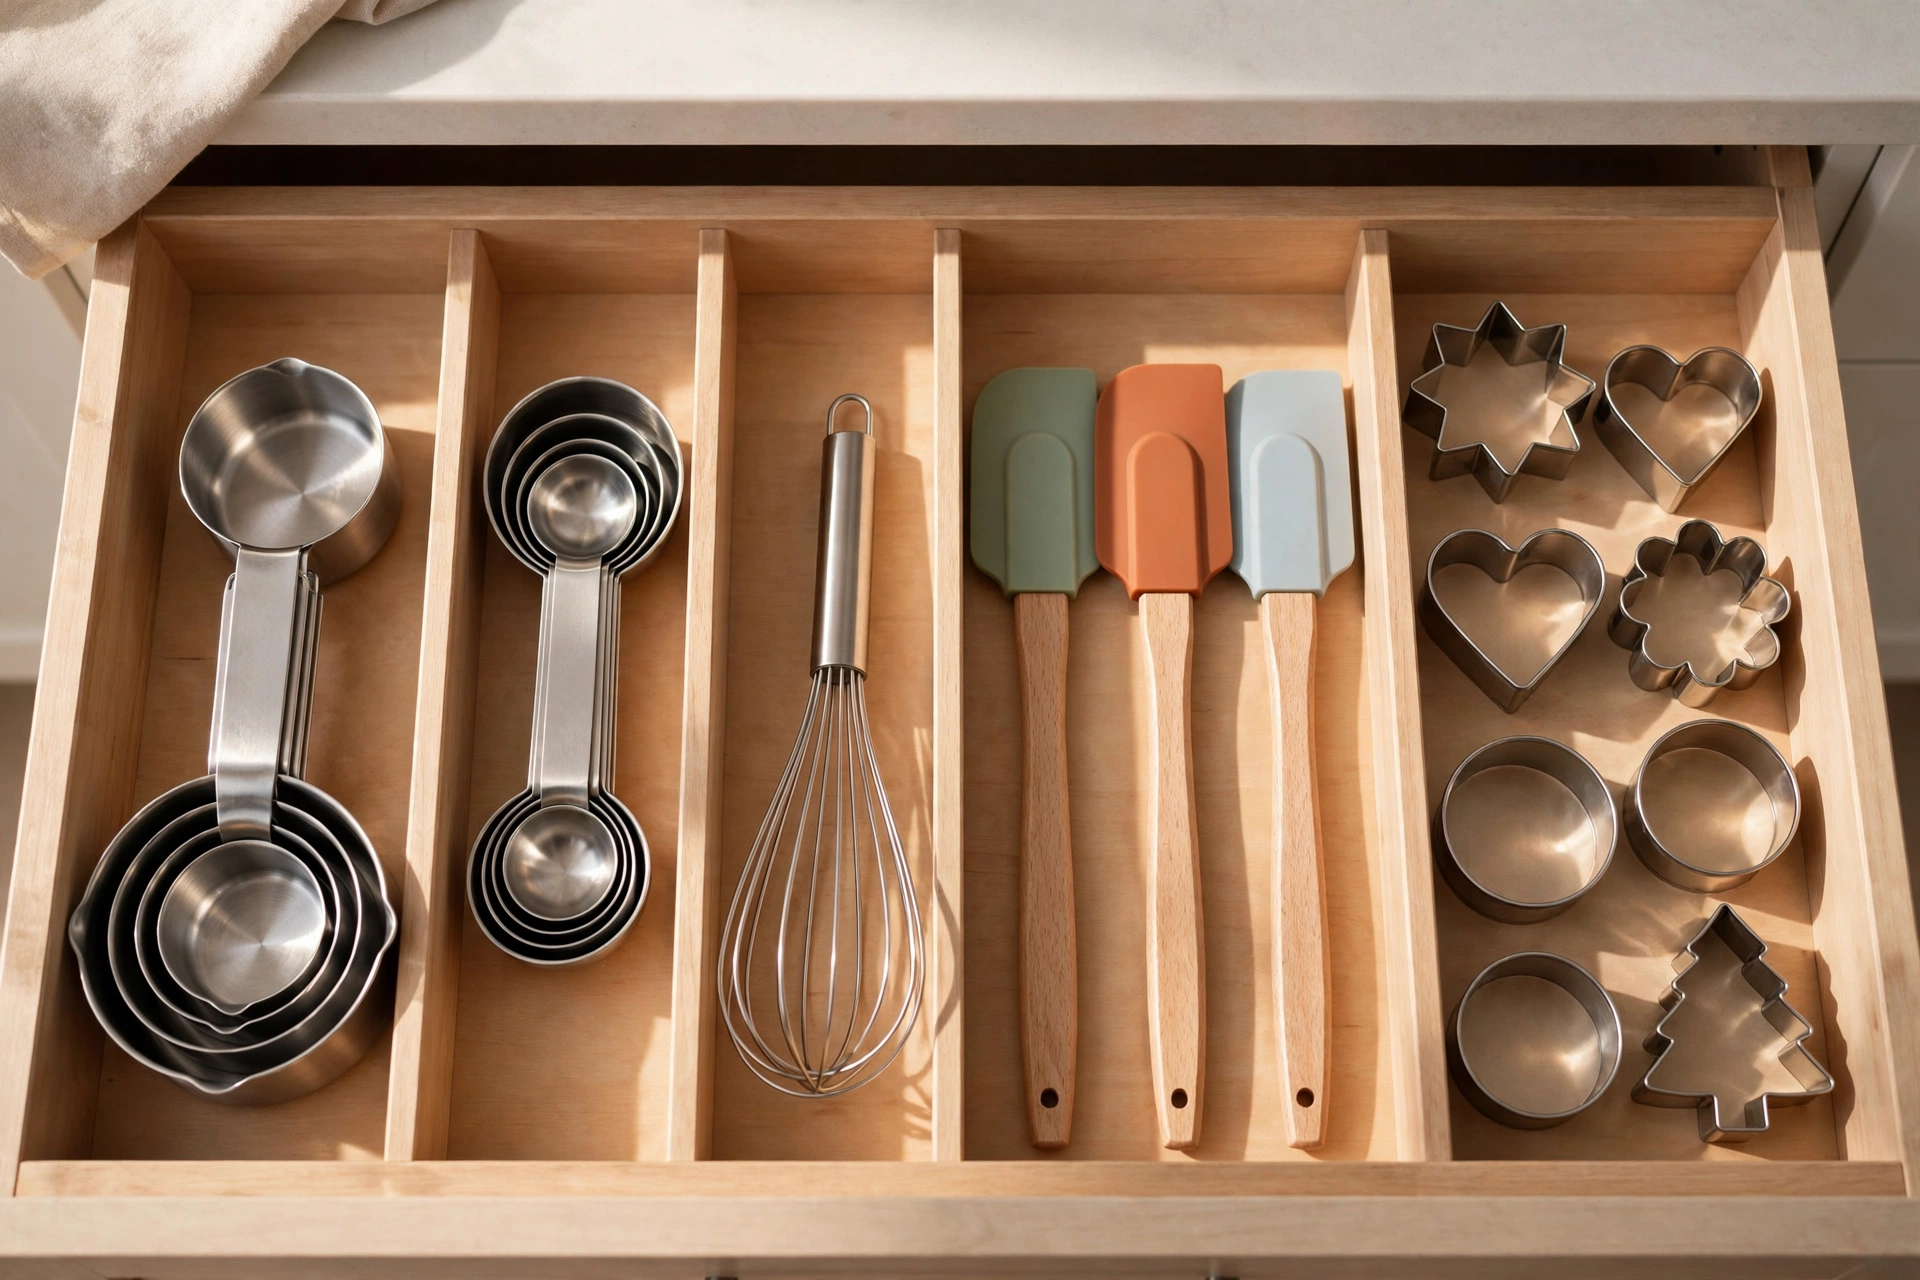
Measuring tools, whisks, and spatulas. A deep drawer with drawer dividers works perfectly: measuring cups nested in one section, spoons in another, whisks and spatulas in a long compartment. No drawer to spare? A tall crock or caddy inside your baking zone holds them just as well.
The rolling pin. It never fits anywhere. Give up trying to lay it flat in a drawer — store it in a tall bin or hang it on a sturdy hook inside the cabinet door or on the wall near your zone.
Small appliances. The stand mixer question divides households. If you use it weekly, it earns counter space near your baking zone (a mixer you have to haul out is a mixer you won’t use). Used monthly or less? It lives on a low shelf, wheels or a sliding mat making it easy to pull forward when its day comes.
Keeping Your Baking Supplies Organized Without Becoming the Flour Police
The best system is the one you’ll actually maintain, and maintenance should be tiny, not tyrannical. Three small habits do the job:
The ten-minute reset. After a big baking day, put everything back before the flour dust settles — literally. Wipe the containers, check that lids are sealed, and return the caddy to its spot. Ten minutes now beats an hour-long reorganization later.
One in, one out for the extras. A new extract flavor, a trendy sprinkle mix, a specialty flour — fine, they can come in, but something similar goes out (or gets used up first). This one rule stops the collection from quietly doubling every holiday season.
The seasonal swap, twice a year. Keep one clearly labeled box for seasonal baking stuff — holiday spices, themed cutters, candy melts, the peppermint extract. It lives on the highest shelf year-round and only comes down for its season. When the season ends, the box goes back up before ordinary days swallow it. Two swaps a year, five minutes each.
And keep a running restock note — on your phone or stuck to the fridge. When you scoop the last of the flour or notice the vanilla is nearly gone, write it down immediately. Baking emergencies are almost always just shopping-list failures in disguise.
The Sweet Payoff
Here’s what changes once your baking supplies are organized: you start baking more. Not because you have more time, but because the friction is gone. The Saturday morning when the kids ask for pancakes from scratch, you say yes without dreading the cabinet. The evening a friend is coming over, you pull a cake together instead of ordering one. The system doesn’t just tidy a shelf — it quietly removes every small excuse between you and the oven.
So this weekend, pull it all out, be honest about what’s stale, give everything one good home, and label it like you mean it. Future you — the one elbow-deep in chocolate chip cookie dough — will be very, very grateful.
[…] three things happen at once. First, the rest of your pantry stops being collateral damage — your baking supplies and spices stay untouched instead of buried under cracker crumbs. Second, cleanup becomes obvious: […]
[…] Every slice exposes fresh crumb to the air. If you bake your own loaves, you already know that keeping your baking supplies organized makes the whole from-scratch routine easier — and unsliced storage is the baker’s reward: a […]