
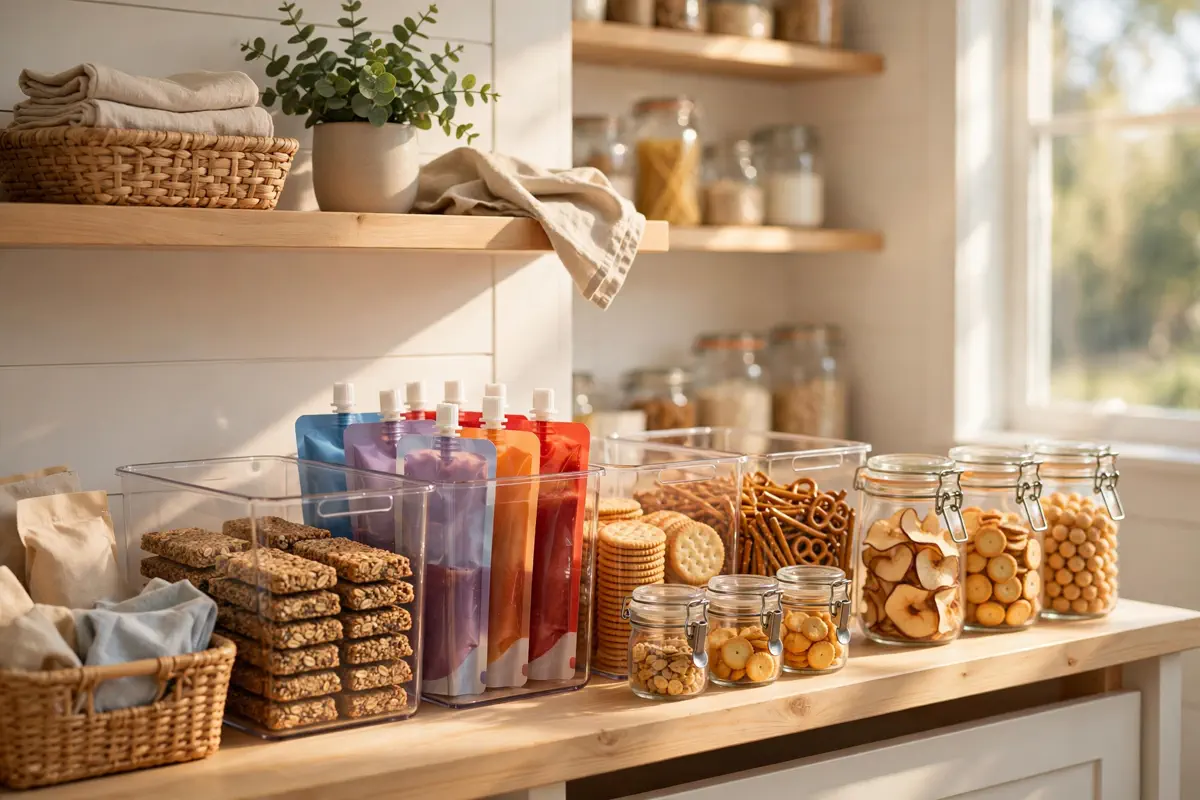

If you have ever opened your pantry at 4 p.m. to find a landslide of cracker boxes, three open bags of chips, and a juice box crushed into the back corner, you already know the truth: kids do not mean to destroy a pantry, but they absolutely will. A kids snack station fixes this, not by nagging anyone into tidiness, but by redesigning the space so the easy choice is also the tidy choice. It is one of those small projects that pays you back every single day — fewer crumbs, fewer interruptions, and a grocery bill that stops including duplicates of things you already had.
Last spring, a friend of mine with three kids under nine told me she was restocking snacks twice a week and still hearing complaints that there was nothing to eat. We spent one Saturday afternoon building a snack station in her pantry — two bins, one basket, and a strip of labels. A month later she texted me a photo of the same corner, still tidy: “I forgot this was ever a problem.” That is the whole promise here.
Why a Kids Snack Station Changes Everything
Snacks are the highest-traffic item in any family pantry. Breakfast and dinner involve planned cooking, but snacks happen ten times a day on pure instinct — after school, between playdates, during homework, at bedtime. Every one of those moments is a small opportunity for chaos: a box pulled out and never returned, a bag torn open with teeth because no one could find the scissors, the entire shelf rearranged in search of the “good” granola bars.
A dedicated snack zone removes the hunting. When every snack lives in the same small area, in containers kids can reach and open themselves, three things happen at once. First, the rest of your pantry stops being collateral damage — your baking supplies and spices stay untouched instead of buried under cracker crumbs. Second, cleanup becomes obvious: everything goes back in the same two or three spots. Third — and this surprised my friend the most — kids actually eat better. When the visible, reachable choices are the ones you stocked on purpose, the chips at the back stop winning by default.
There is also a quieter benefit: independence. A five-year-old who can fetch their own apple slices without dragging a kitchen chair across the room is a five-year-old who is not asking you to stop what you are doing. Multiply that by every afternoon for the next few years, and the return on one weekend of setup is enormous.
Pick the Right Spot: Shelf, Drawer, or Rolling Cart
Before buying a single bin, decide where the station lives. The rule is simple: it must be somewhere your kids can reach without climbing. For most families, that means a low pantry shelf — the one closest to the pantry opening, at hip height or below for the smallest snacker in the house.
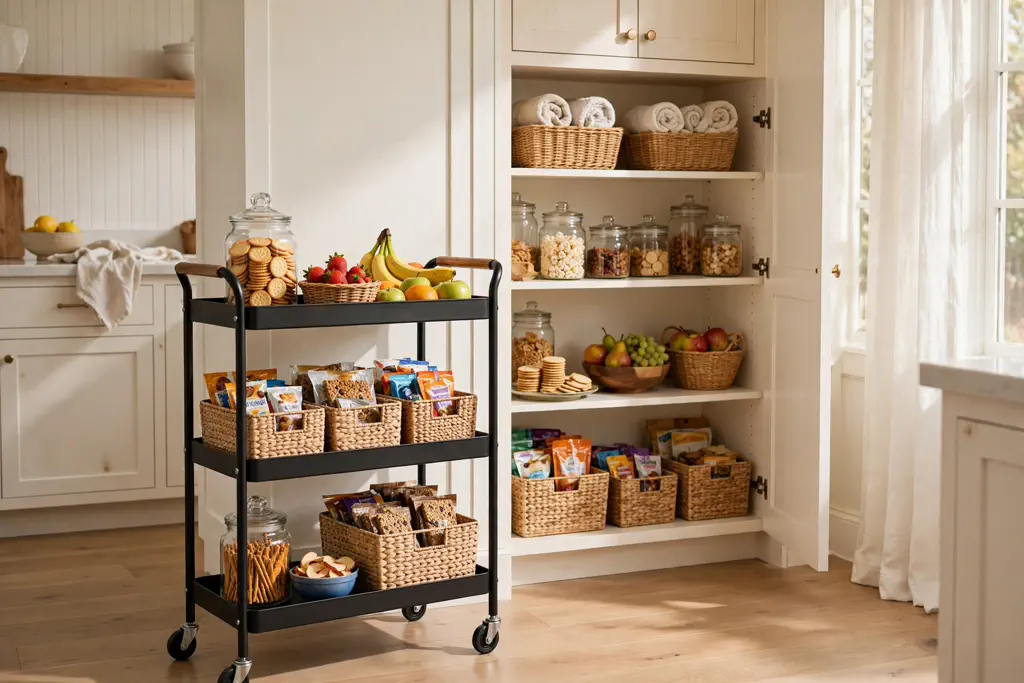
No reachable shelf or drawer? A slim rolling cart tucked beside the pantry or in a hallway closet is a favourite among parents in small homes. The cart holds snack bins on two or three tiers, rolls out at snack time, and rolls away when you want the kitchen back. Just make sure whatever you choose has a defined boundary — the station should feel like one zone, not like snacks scattered across three rooms.
One more placement tip from hard experience: keep the station away from your canned goods and glass jars if you can. Heavy items and small hands reaching past each other is a combination you do not need. If space is tight, put the heavy stuff up high and the kid zone down low, with a clear visual gap between the two worlds.
Build Your Kids Snack Station With the Right Containers
This is where most snack stations succeed or fail. The containers are not decoration — they are the system. And the system only works if it survives a tired, hungry seven-year-old on a Tuesday afternoon.
Here is what actually holds up in real households:
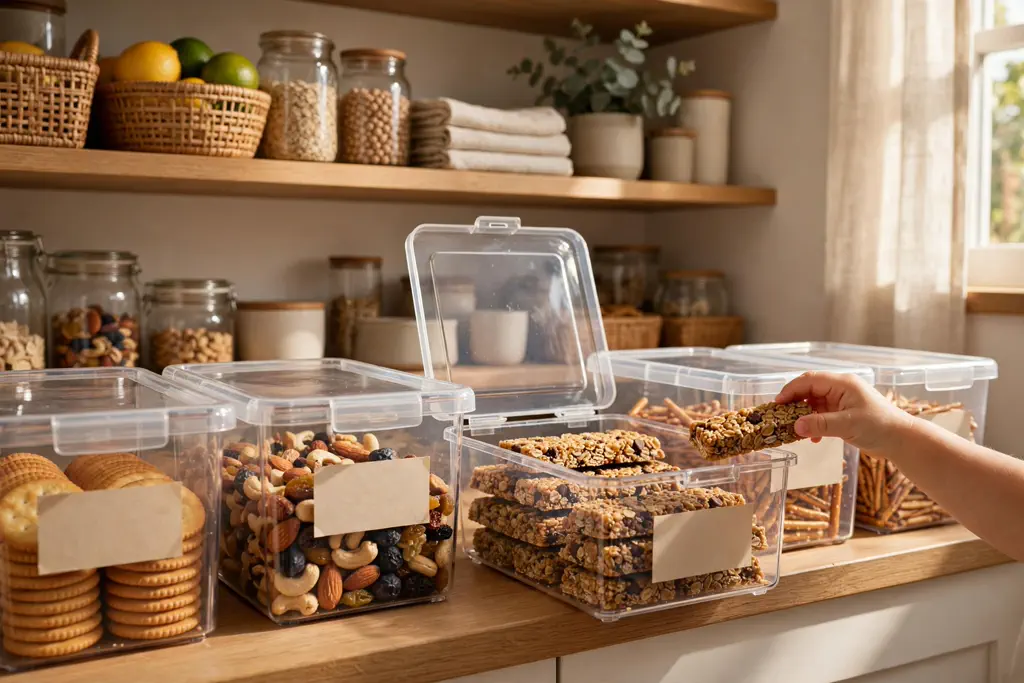
- Open-front bins for individually wrapped snacks. Granola bars, fruit pouches, cheese sticks, and cracker packets go in wide bins with a low or open front so kids can see and grab without lifting lids. Clear bins are ideal because visibility means kids stop digging — but if a bin of wrappers gives you visual stress, use a frosted or solid bin with a label. The label matters more than the transparency.
- Airtight canisters for decanted dry snacks. Goldfish, pretzels, cereal, and trail mix stay fresher in sealed canisters, and decanting lets you ditch the bulky cardboard that eats shelf space. Choose canisters with flip-top or easy-twist lids a child can manage — skip anything that needs two hands and real grip strength. Pro tip: stick a small piece of tape on the bottom with the expiration date from the original package.
- One divided caddy for the “snack of the week.” A small divided caddy holds a rotating selection — this week apple slices and hummus cups, next week rice cakes and yogurt tubes. Rotating keeps the station fresh and gives you an easy way to steer choices without a lecture.
- A “lunchbox” basket by the door. If your mornings are rushed, keep a small basket of lunchbox-safe snacks — bars, fruit cups, crackers — near where bags get packed. It is technically part of the station even if it lives ten feet away, and it turns packing lunches from a five-minute hunt into a ten-second grab.
Whatever you buy, buy containers that can be wiped clean in seconds. Spilled applesauce is not a question of if, it is a question of when. Hard plastic, glass, or melamine will forgive you; fabric and woven baskets will not.
Stocking Your Kids Snack Station Without the Junk (or the Battles)
Here is the part parents quietly worry about: if kids can help themselves, will they just live on cookies? In practice, the answer is no — as long as you curate what is available. Kids choose from what they can see and reach. You decide what they can see and reach. That is the whole trick, and it works without a single speech about nutrition.
A balanced station usually runs about two-thirds “everyday” snacks and one-third “sometimes” treats. Everyday snacks are the things you are happy to see eaten at any hour: fresh fruit, veggie sticks, cheese, yogurt, popcorn, whole-grain crackers, hard-boiled eggs (these need the fridge — see below). Sometimes treats are the cookies, chips, and candy you are fine with in moderation.
The kids snack station works best when the everyday snacks are the most visible and easiest to grab. Put the fruit and cheese at the front of the shelf or the top tier of the cart, and the treats a little further back or on a higher rung. You are not hiding anything — you are just stacking the odds.
For items that need refrigeration, create a matching mini-zone in the fridge: one clear bin on a low shelf labeled for snacks, stocked with yogurt cups, cheese sticks, cut veggies, and fruit. When your fridge follows the same logic as your pantry, kids learn one system and use it everywhere. If your refrigerator is a free-for-all, our guide to fridge organization by zones will help you carve out that shelf in about twenty minutes.
Let your kids help with the stocking list. This sounds like extra work, but it is actually a shortcut: children who chose the snacks eat the snacks. Give them a shortlist — “pick two fruits, one crunchy thing, and one protein” — and let them own it. A kid who lobbied for the rice cakes will defend the rice cakes to the death, and you will not find them abandoned behind the cereal.
Labels, Rules, and the Five-Minute Weekly Reset
A station without labels lasts about a week. Labels are what keep the system alive after the initial enthusiasm fades, because they tell every person in the house — kids, partners, grandparents, babysitters — exactly where things belong. You do not need anything fancy: a label maker, chalk labels, or even masking tape and a marker all work. The best labels are short and specific enough to guide but general enough to survive changing tastes. “Granola Bars” is better than “Nature Valley Oats & Honey” — next month’s snack switch will not require a relabeling session.
Picture labels are magic for pre-readers. A toddler who cannot read “Fruit” absolutely understands a photo of an apple taped to the bin. Take the pictures with your phone and stick them on with clear tape. It takes ten minutes and turns the station into something even a three-year-old can reset.
Now the rules — keep them to three, and make them kind. Ours looked like this when my kids were small: take one, put the wrapper in the bin, and if a bin is empty, tell me. That is it. The third rule is the most important, because it closes the loop between the station and the grocery list. A kid who reports “the cracker bin is empty” is doing inventory for you.
Finally, the five-minute weekly reset. Right after the weekly grocery run, spend five minutes on the station: toss anything stale, wipe a crumb trail, refill the bins, and rotate the “snack of the week” caddy. Do it with the kids if you can — it takes five minutes precisely because everyone knows the system. Without this tiny ritual, even the best station drifts.
If your household manages allergies, labels become safety tools, not just organization tools. Use a colour-coded system — a green dot for “safe for everyone,” a red dot for “ask first” — and keep allergen-containing snacks in a lidded bin with a clear warning label. If siblings have very different needs, give each child their own small basket within the station. Personal baskets end a surprising number of arguments.
Mistakes That Quietly Kill a Snack Station
Most failed snack stations fail for the same handful of reasons, and every one of them is avoidable once you know to watch for it:
- Stocking too much variety at once. Twenty different snacks sounds generous, but it creates decision paralysis and a station that looks ransacked within a day. Six to ten options, refreshed weekly, beats a sprawling buffet every time.
- Putting it out of reach. The top shelf of a walk-in pantry might look great in a photo, but if kids need a step stool, they will bring the chaos back — climbing, reaching, knocking things down. Kid height is non-negotiable.
- Skipping the lids-on test. Before you commit to any container, hand it to your youngest snacker and ask them to open and close it. If they struggle, the container will live permanently open, and stale crackers will be your reward.
- No overflow plan. Bulk buys and party packs have to live somewhere. Keep a single overflow bin on a high shelf or in a hall closet — labelled “Snack Overflow” — and refill the station from it. Without this, the extra boxes pile up next to the station and the whole area slowly drowns.
- Treating it as set-and-forget. The weekly reset is the entire maintenance program, and it is five minutes. Skip it for a month and you will be back to cracker avalanches, wondering what went wrong. Nothing went wrong — it just needed its five minutes.
A kids snack station will not solve every kitchen battle, but it solves the one you fight most often, in the room you use most, at the hour you are most tired. This weekend, clear one shelf, grab a few bins, and let your kids help you stock it. Monday afternoon, when snack time arrives and nobody has to ask you a single question, you will know exactly why this small project matters so much.
[…] are faster than their parents. And if younger children are not ready to pack but love to graze, a kids’ snack station alongside the lunch station keeps little hands out of the lunch bins while giving them their own […]