
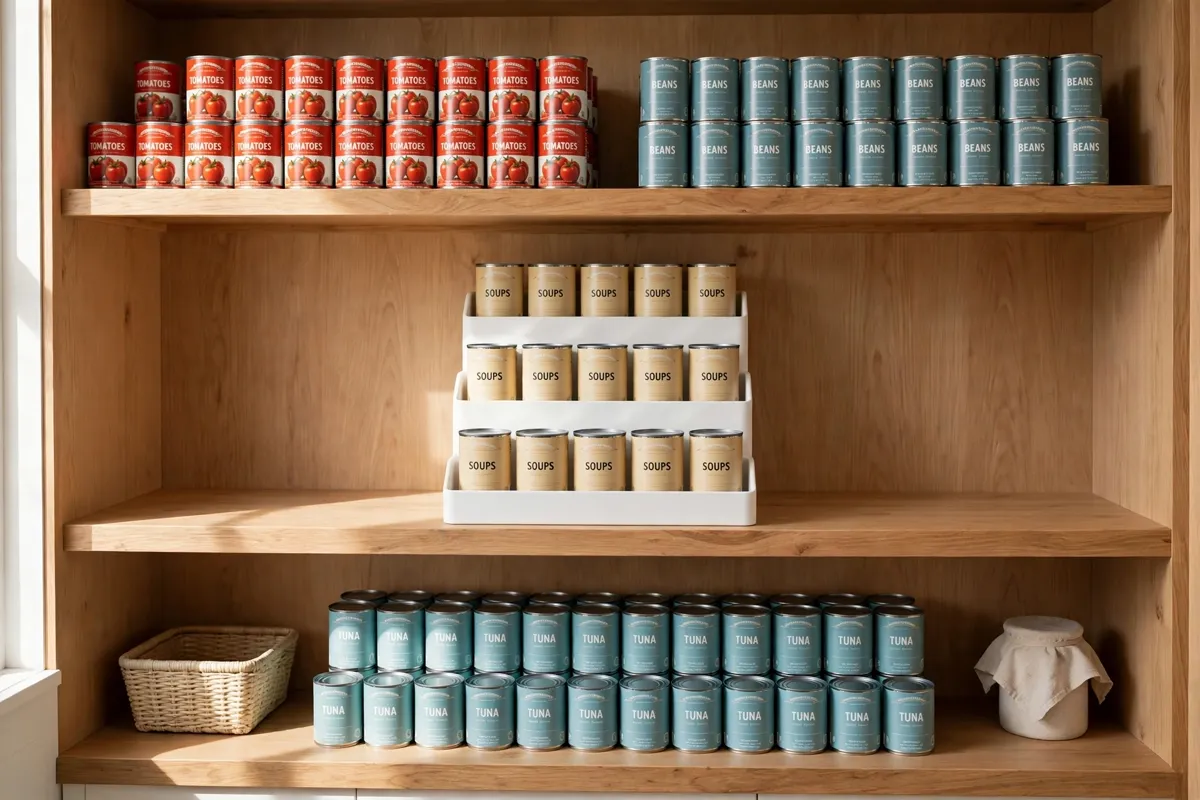

Last spring I stood in my pantry at 5:40 on a Tuesday, trying to find a can of crushed tomatoes for the pasta sauce my kids were already asking about, and I felt a kind of despair that was entirely disproportionate to the situation. Three cans rolled off the shelf and onto the tile — one split open the bag of lentils on the floor below, which felt like the pantry personally insulting me. I had at least eight cans of tomatoes in there somewhere. I just couldn’t see them. That was the week I decided that canned food organization ideas were not a hobby for people with label makers and spare time. They were a survival skill.
Here’s the thing about cans: they’re heavy, they’re all the same shape, and their labels are designed to be read in a brightly lit supermarket aisle, not in the dim cave of your pantry at dinner time. Stack them two deep and the back row becomes a mystery. Buy in bulk and you end up with a wall of tuna and a sinking feeling every time you shop, because you can’t remember what’s already there. But the good news is that organizing canned goods is one of the highest-return projects in your whole kitchen. It costs almost nothing, takes an afternoon at most, and pays you back every single day at dinner time. You stop buying duplicates. You stop throwing away expired cans. You cook faster because you can see what you have. Below are the canned food organization ideas I actually use now — tested in my own cramped pantry, borrowed from professional organizers, and arranged from “do this first” to “do this if you want to feel like you have your life together.”
Start With the Great Can Clear-Out
Every good organization project starts by making a mess on purpose, and cans are no exception. Pull every single can out of your pantry and line them up on the counter or the kitchen table. Yes, all of them. Yes, it will look ridiculous. This step matters because you cannot organize what you cannot see, and most pantries are hiding at least five cans that expired during a previous presidency.
Now go through them one by one. Check the date stamped on the top or bottom of every can — that best-by date is the manufacturer’s guarantee of quality, and cans stored properly often stay safe well past it, but anything more than a year or two past is not worth the shelf space. Look for cans with dents along the seams, bulging lids, or rust. A deeply dented can can have a compromised seal, and a bulging can is a hard no — toss it without opening. Wipe down the survivors with a damp cloth; cans pick up a film of grease and dust that makes everything feel grimy.
While you’re at it, make two piles: cans you actually cook with (the tomatoes, beans, tuna, broth) and the mystery cans — the coconut milk you bought for one Thai curry in 2024, the water chestnuts, the anchovy paste. Be honest with yourself. If you haven’t used it in a year, you won’t use it next month either. Give the odd ones to a food bank if they’re in date — food banks genuinely love canned goods — or plan a “clean out the cans” week of soups and stews. My rule after the Great Tomato Avalanche of last spring: if a can wouldn’t survive a three-question quiz about when I’d use it, it leaves the pantry.
The Canned Food Organization Ideas That Work All Start With Sorting
Once you’ve got your keepers, sort them into categories the way you cook, not the way a grocery store stocks its aisles. The categories that work for most families:
- Cooking staples — crushed tomatoes, tomato paste, coconut milk, beans, lentils, broth. These get the best real estate because you reach for them weekly.
- Proteins — tuna, salmon, chicken, sardines. Lunch-makers live here.
- Soups and ready meals — the “I’m too tired to cook” shelf. No judgment; this shelf has saved my week more than once.
- Fruits and sweet things — pineapple, peaches, pumpkin purée, pie filling.
- Baking and specialty — condensed milk, evaporated milk, artichoke hearts, the fancy stuff you use monthly.
Sorting by use instead of by food type is the single most important shift I made. I used to group all vegetables together, which meant the green beans I open twice a year sat next to the black beans I open twice a week, and the black beans hid behind the corn. Now the weekly staples live at eye level in the front, and the twice-a-year cans live up high where they belong.
A strip of painter’s tape with “SOUPS” or “BEANS” written in marker, stuck on the shelf edge, costs nothing and ends the game of “where did you put the tuna” forever. For a neater look, small clip-on shelf labels work beautifully. This is the same principle behind a good pantry decanting and labels system — a little labeling goes a long way toward keeping the system intact after you’re done.
Stadium Seating: The Canned Food Organization Idea That Ends Avalanches
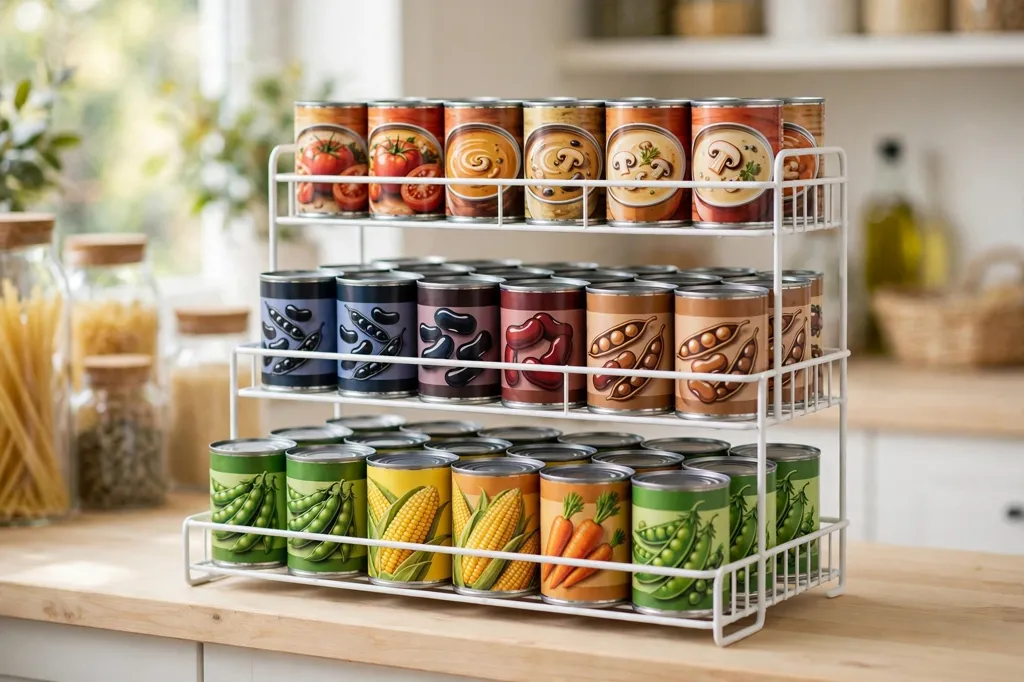
If you buy exactly one product for this project, make it a tiered can rack — the stepped shelf that arranges your cans like stadium seats so every label faces forward and nothing hides behind anything else. This one purchase solves the core problem of canned food storage: cans are short, shelves are deep, and the back row is a black hole. A three-tier rack lifts the back rows into view, and suddenly you can inventory your whole collection in one glance.
Measure before you buy. This is the step everyone skips and regrets: measure your shelf’s width, depth, and — critically — the height between shelves once a tall can of tomatoes is sitting on the top tier. I’ve seen too many people order a rack that clears the shelf by a quarter inch with nothing on it and then doesn’t fit the actual cans. For deep shelves, consider a gravity-fed can dispenser instead — you load cans in the top and they roll forward as you take one from the bottom, which automatically rotates your stock so the oldest gets used first.
A few more visibility tricks that cost little or nothing:
- Single-depth rows. If you have the shelf space, store cans only one row deep, labels facing out. It looks like a little grocery store and it works like one.
- Tension rods as fences. A spring-loaded curtain tension rod placed across a shelf stops cans from toppling forward in a domino chain. Under two dollars, absurdly effective.
- Turntables for corners. A lazy Susan on a pantry shelf or in a cabinet means one spin reveals everything — great for the soups-and-sauces collection. Just make sure the turntable is sturdy enough for the weight; cans are dense.
- Stackable bins for bulk. If you buy cases of the same item, a clear stackable bin keeps the case together so it reads as one unit instead of twenty loose cans migrating across the shelf.
Canned Food Organization Ideas for Tiny Pantries: Doors, Drawers, and Corners
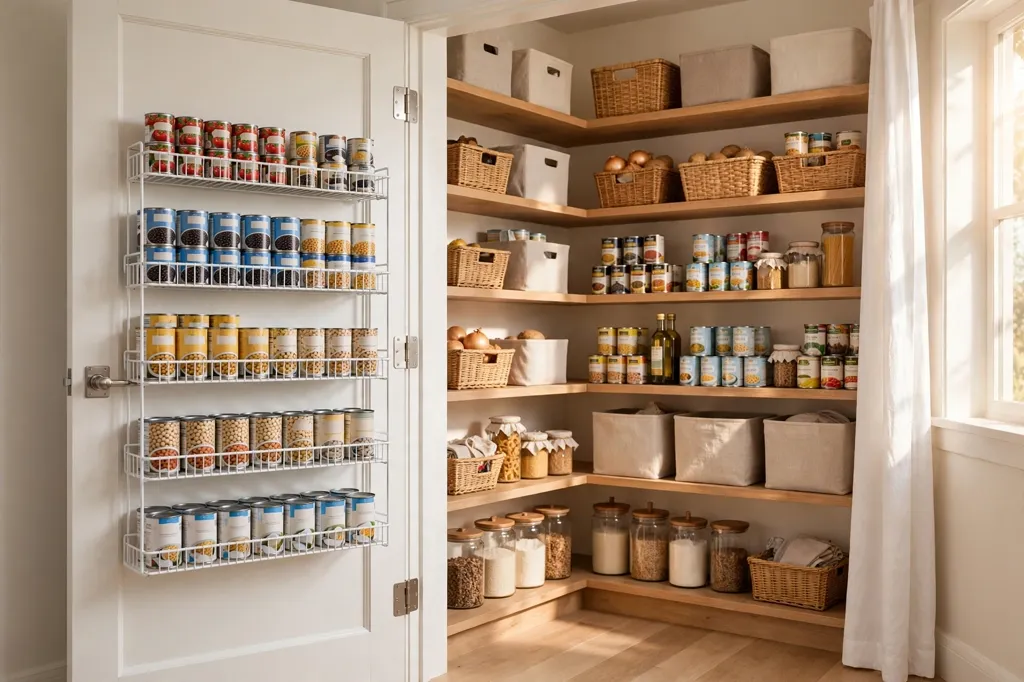
Not everyone has a walk-in pantry with room for stadium seating. If your “pantry” is two cabinets and a prayer, the trick is to use the spaces you’re currently ignoring. The inside of a pantry door is the single most underused storage surface in most kitchens — a narrow over-the-door wire rack holds dozens of cans and takes zero shelf space. Just confirm the door and hinges can handle the weight; cans add up fast, so look for a rack rated for heavy loads and mount it into the door’s solid frame, not just the panel.
Deep cabinets are the other opportunity. A pull-out sliding drawer retrofit turns a dark 24-inch-deep cabinet into a tray you glide toward you — no more kneeling on the kitchen floor reaching past the cereal to find the chickpeas. These install with a few screws and a drill, and they’re the closest thing to a magic trick I’ve ever done in a kitchen.
And then there are the corners nobody thinks about: the narrow gap between the fridge and the wall (perfect for a slim rolling cart that holds two columns of cans), the cabinet above the microwave that you can’t reach for daily use but is perfect for the backup stock, the under-sink cabinet’s door interior for a small rack of cleaning-adjacent items. Small-space living is really an exercise in noticing unused inches, and if that’s your situation, our bulk food storage ideas pair well with these tricks — the principles for storing cases of cans are the same ones that keep a tiny kitchen functional.
The FIFO Habit That Keeps Cans From Ever Expiring Again
The best storage system in the world won’t help if new cans keep landing in front of old ones. FIFO — first in, first out — is the restaurant-industry habit of always using the oldest stock first, and it’s the difference between an organized pantry and a museum of expired green beans.
Make it automatic rather than a chore. When groceries come home, slide the new cans to the back of each row and pull the older ones forward — thirty seconds, done, and you’ll never discover a 2023 can of corn again. If you use a gravity dispenser, this happens by design. If you shop in bulk, write the purchase month on the can’s lid with a marker as you unload; it takes two seconds per can and makes rotation decisions instant six months later.
I also keep a tiny running inventory on the inside of my pantry door — a whiteboard with two columns, “have” and “need,” where cans get tallied. It sounds fussy. It takes ten seconds after shopping. And it has completely ended the “I thought we had chickpeas” / “we have nine cans of chickpeas” cycle that used to plague my grocery list. For households that really stock up, this pairs naturally with a broader budget pantry organization plan — knowing exactly what you have is how you stop spending money on duplicates.
Keeping the System Alive: The Five-Minute Monthly Reset
Here’s the honest part: every pantry drifts. New cans arrive, someone puts the soup where the beans go, a bag of chips migrates onto the can shelf. The system doesn’t fail because it was badly designed; it fails because nobody maintains it. So build maintenance into something you already do.
Once a month — I do it while waiting for the oven to preheat — spend five minutes: pull forward anything that’s drifted to the back, check for anything expiring in the next three months and move it to the front of its row, and straighten labels to face out. That’s it. Five minutes. If you find the same category keeps migrating, that’s data: the zone might be in the wrong spot for how your household actually cooks, so move the zone rather than fighting human nature.
Twice a year, do a mini version of the original clear-out: check every date, wipe the shelves, and be honest about the mystery cans again. They accumulate like dust. And while you’re in maintenance mode, it’s worth glancing at the rest of your food storage — a tidy can system sits inside a tidy pantry, and if your dry goods are still living in half-open bags, our food storage container organization guide will sort that out the same weekend.
That’s the whole system: clear out, sort by how you cook, make every label visible, use the forgotten spaces, rotate oldest-first, and spend five minutes a month keeping it honest. Do that, and the next time you’re hunting crushed tomatoes at 5:40 on a Tuesday, you’ll reach straight to the right shelf, grab the oldest can first, and get dinner on the table without a single casualty. Your pantry stops being a cave of mysteries and starts being what it was always supposed to be — the quiet, reliable backstage crew of your kitchen.
[…] food you will actually reach for. For a deeper dive on giving cans their own reliable system, these canned food organization ideas pair beautifully with everything in this […]
[…] time you restock, older packages move forward. It’s the same simple rotation habit that keeps canned goods from expiring unnoticed in the pantry — and it works just as well at zero […]
[…] just neighborhoods. If your canned goods are currently scattered across three shelves, our guide to canned food organization shows a simple layout that keeps them […]