

Learning how to organize a dresser sounds simple until you stand in front of yours on a Monday morning, one drawer wedged open on a wadded-up sweater, hunting for a matching sock while the clock mocks you. I have been there. The top drawer of my dresser was once a tangle of charging cables, old receipts, and single socks that had clearly given up on ever finding their partners. This guide is the exact system I used to fix that mess — a drawer-by-drawer plan that takes one afternoon and actually stays neat.
Here is the promise: by tonight, every drawer will have a job, everything inside will be visible at a glance, and getting dressed will stop feeling like a treasure hunt.
Step 1: Empty Everything and Sort Without Mercy
Yes, everything. All of it. Pull every drawer out, dump the contents onto your bed, and give each drawer a quick wipe with a damp cloth. Dresser drawers collect a surprising layer of dust and the occasional crumb that has no business being there. A clean drawer is also a quiet psychological trick — it makes you want to keep it that way.
Now sort the pile into four categories:
- Keep and wear: things you have actually worn in the last year and still like.
- Relocate: items that belong somewhere else entirely — the phone charger, your partner’s sunglasses, that gift card from 2022.
- Donate: anything that no longer fits, has seen better days, or makes you frown when you look at it.
- Toss: socks with no mates, stretched-out underwear, anything stained past saving.
Be honest about the duplicates. You do not need eleven black T-shirts that are all roughly the same. Keep the three you actually reach for and let the rest go to someone who will wear them. Most people discover their dresser is about one-third too full — and the fix is not a bigger dresser, it is fewer things competing for the same space.
If you are also clearing out spare sheets or towels, my guide on how to organize a linen closet will find them a proper home instead of cramming them into a clothes drawer.
Step 2: How to Organize a Dresser Drawer by Drawer
This is the heart of the system. Instead of thinking of your dresser as one big box, give every drawer a single, clear job. Think about the order you get dressed in the morning, and mirror that in your drawers: what goes on your body first lives closest at hand.
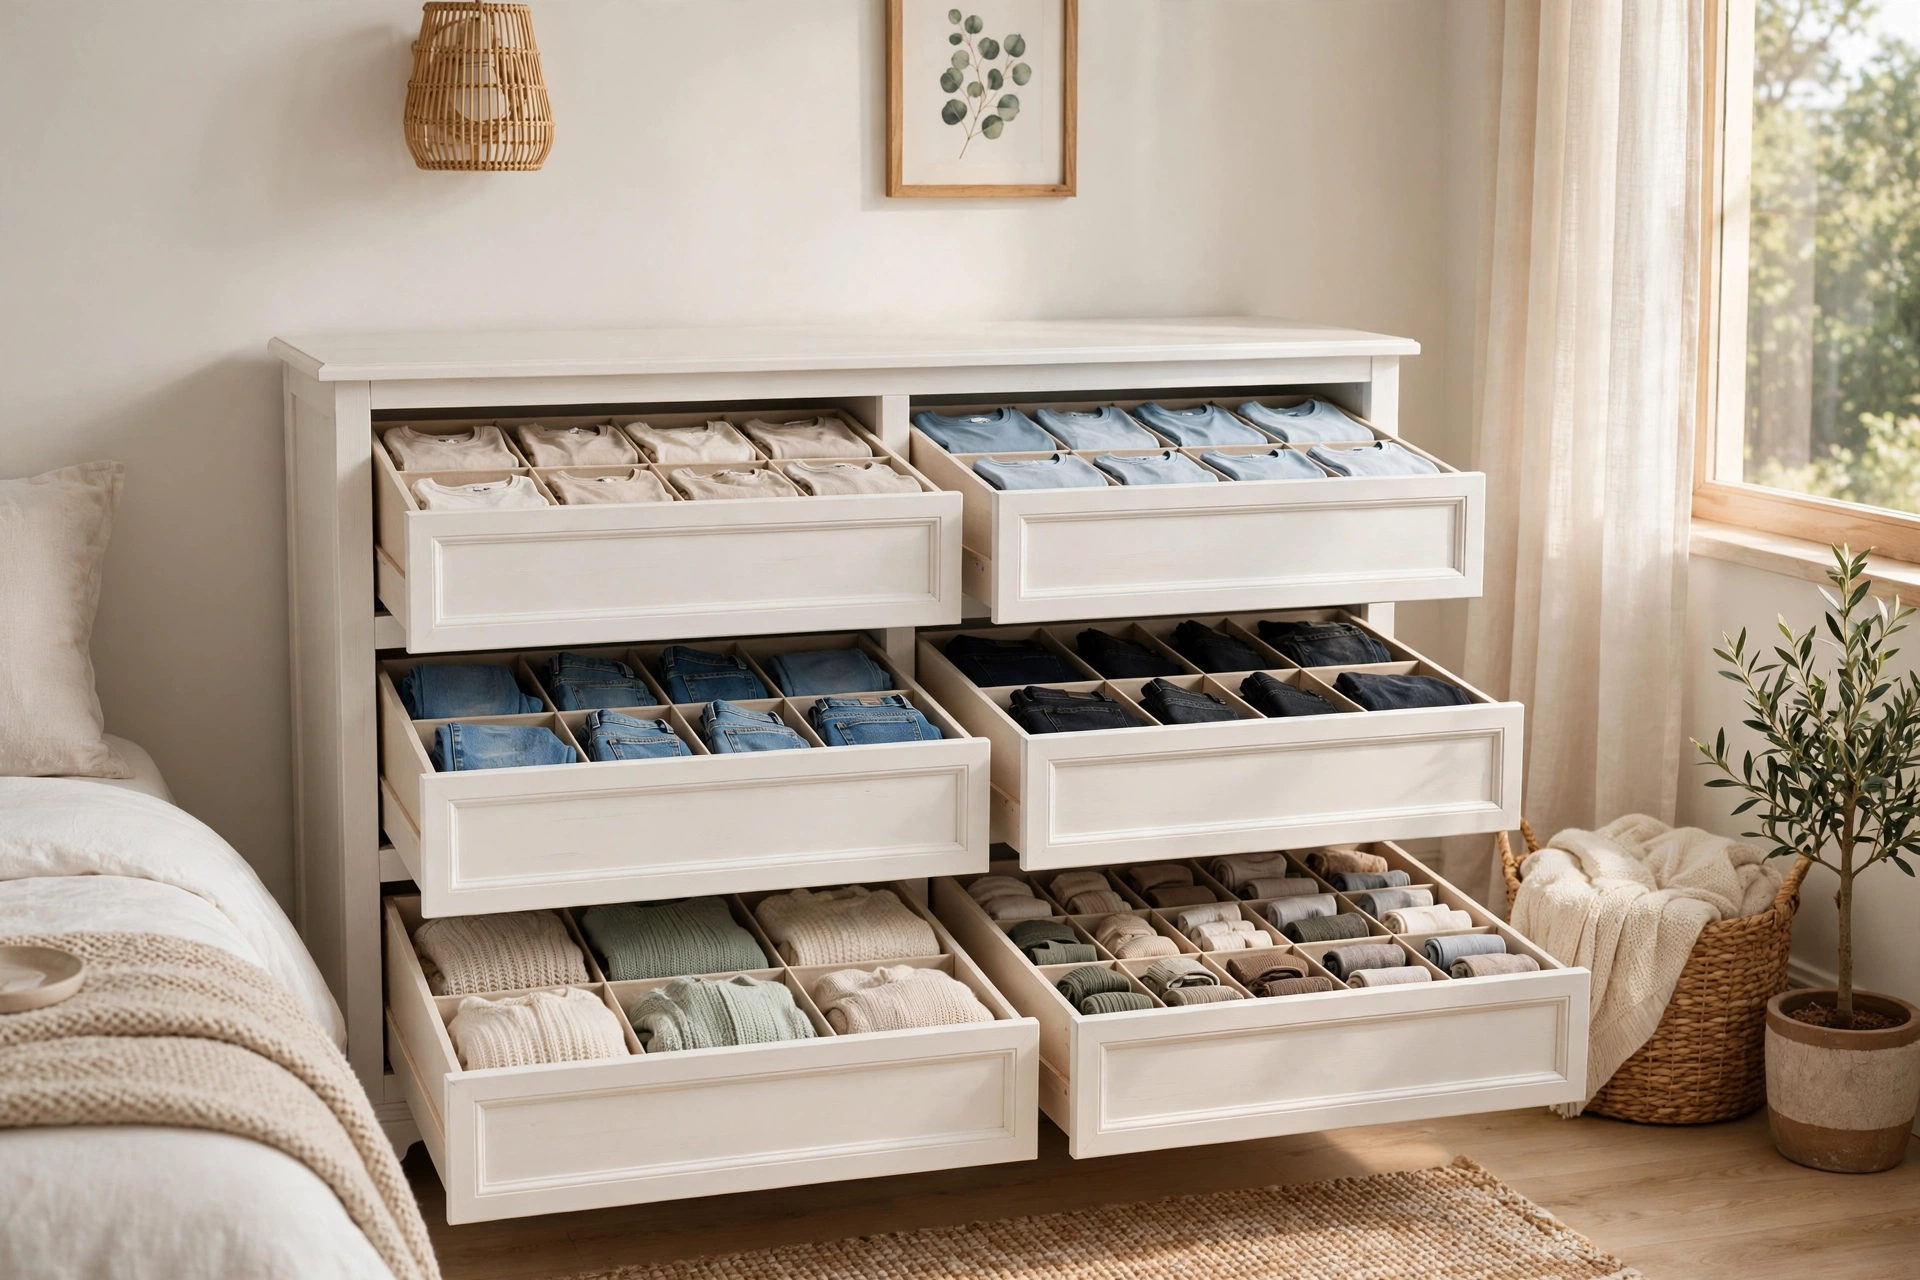
Here is a layout that works for the classic six-drawer dresser, and adapts easily to taller chests or wide low dressers:
- Top drawers — the daily grab zone: Underwear, socks, and bras go here. This is the stuff you touch first every single morning, so it deserves the easiest reach. Small dividers are non-negotiable in these drawers — without them, socks and underwear turn into a soft, stretchy swamp within a week.
- Upper-middle drawers — the everyday uniform: T-shirts, tanks, and tops in one drawer; pajamas and loungewear in the other. These are the categories you wear on rotation, so they live at waist height where you can see everything.
- Lower-middle drawers — bottoms and workout gear: Jeans, shorts, leggings, joggers, sports bras. Pair matching sets together — workout top with its leggings — and you will thank yourself at 6 a.m. before the gym.
- Bottom drawers — the bulky stuff: Sweaters, sweatshirts, and jeans (if they did not fit above). Bottom drawers are deeper and harder to reach, which suits items you grab less often.
One important rule: bulky knits and heavy denim do not belong in drawers — they take up enormous space and do not breathe well. Move them to a closet shelf instead and free up a whole drawer. And do not let off-season clothes hog prime drawer space: rotate them out using the same approach as my seasonal closet rotation ideas: off-season items go to a top shelf, under the bed, or a storage bin.
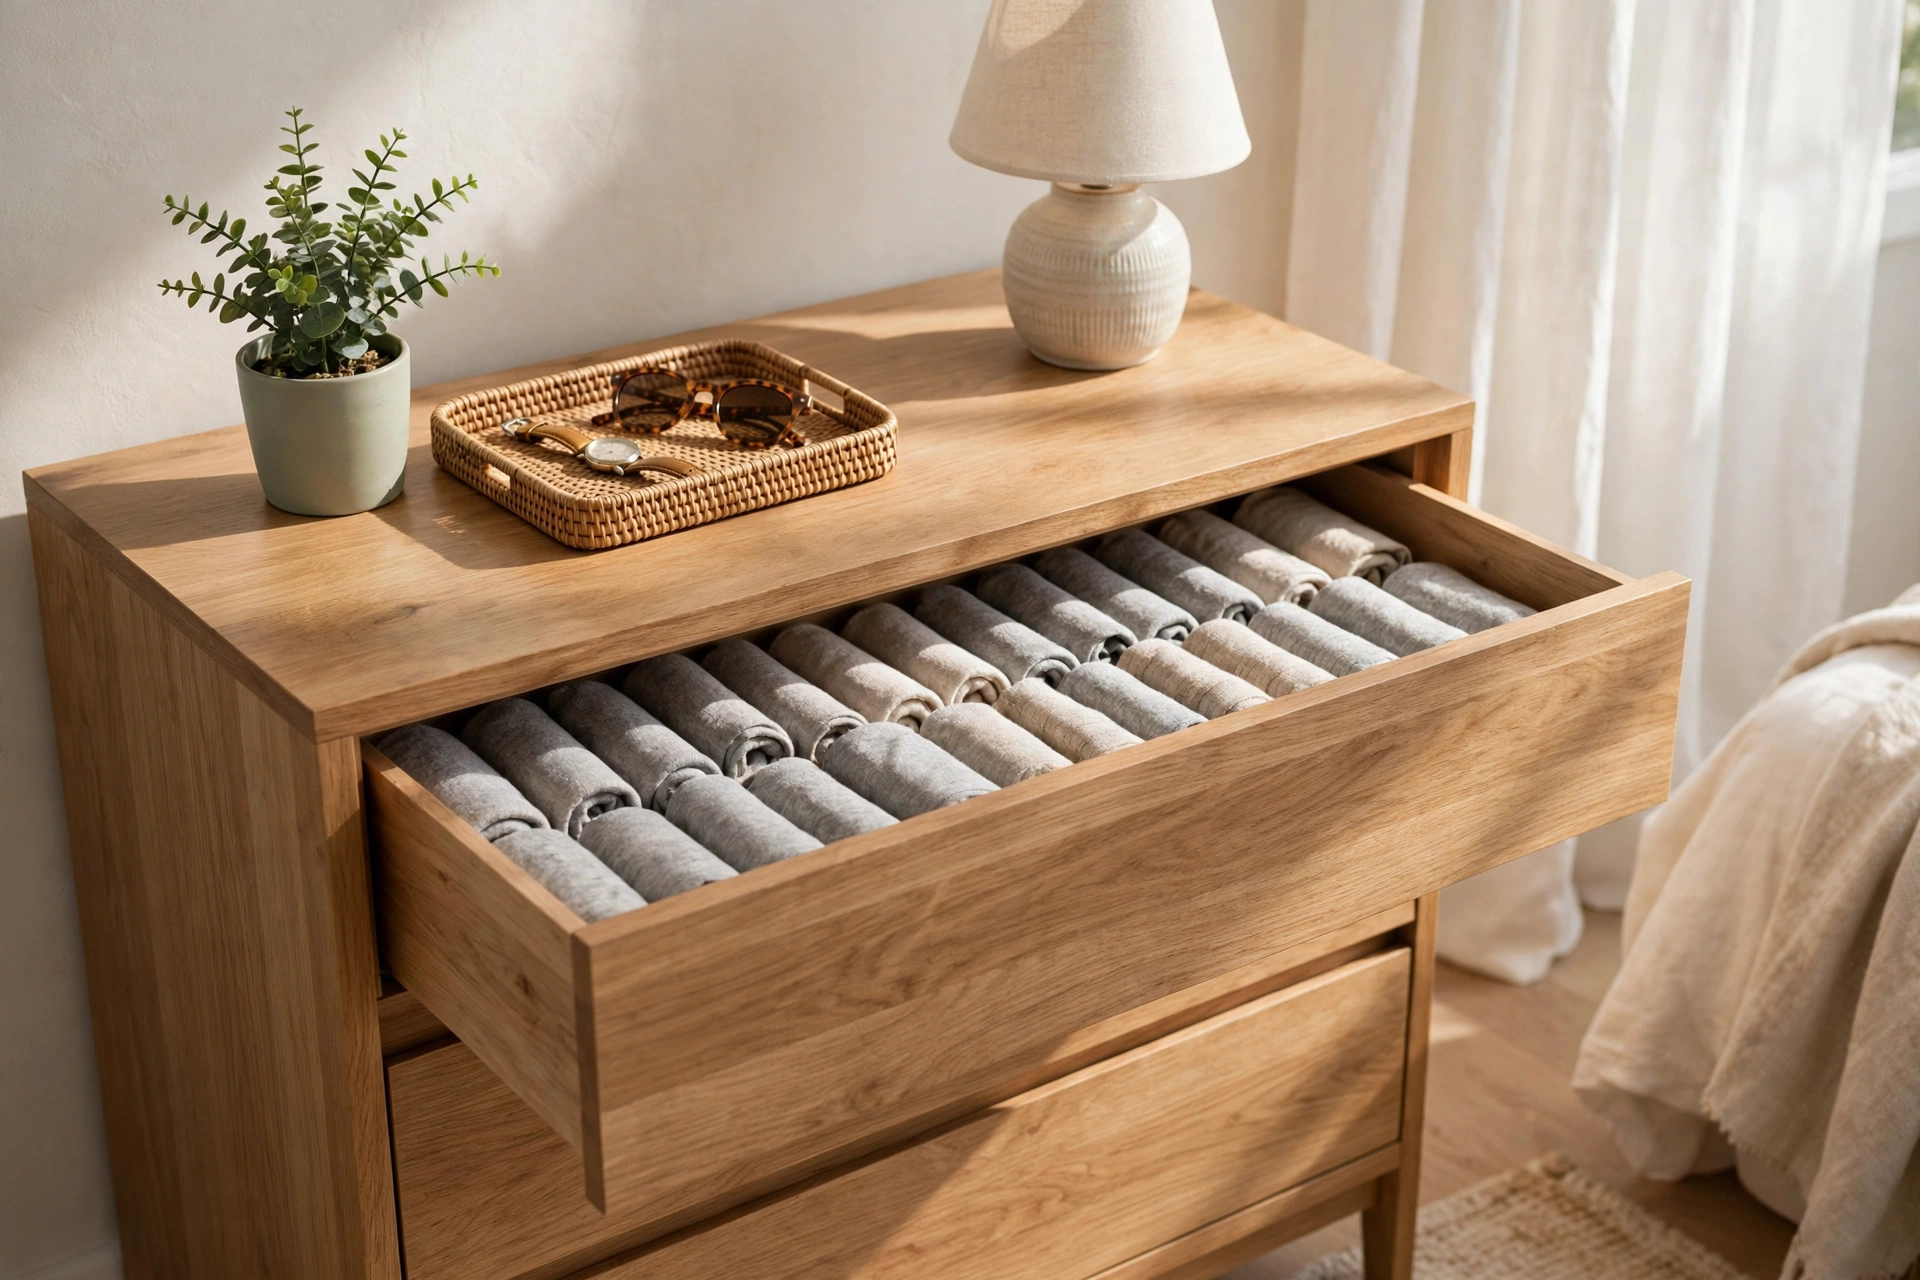
And that shallow top drawer that is not quite a clothes drawer? Give it a defined job too — sunglasses, a small jewelry tray, your watch, lip balm. If it has a purpose, it will not become a junk drawer. (See my guide to closet accessory organization ideas for the full treatment on small extras.)
Step 3: The File-Folding Method That Changes Everything
Here is the single highest-impact trick in this whole guide. Stop stacking folded clothes in flat piles. Every stack has a fatal flaw: the shirt you want is always at the bottom, and extracting it avalanches the five shirts above it. Within days, the drawer looks like a laundromat exploded.
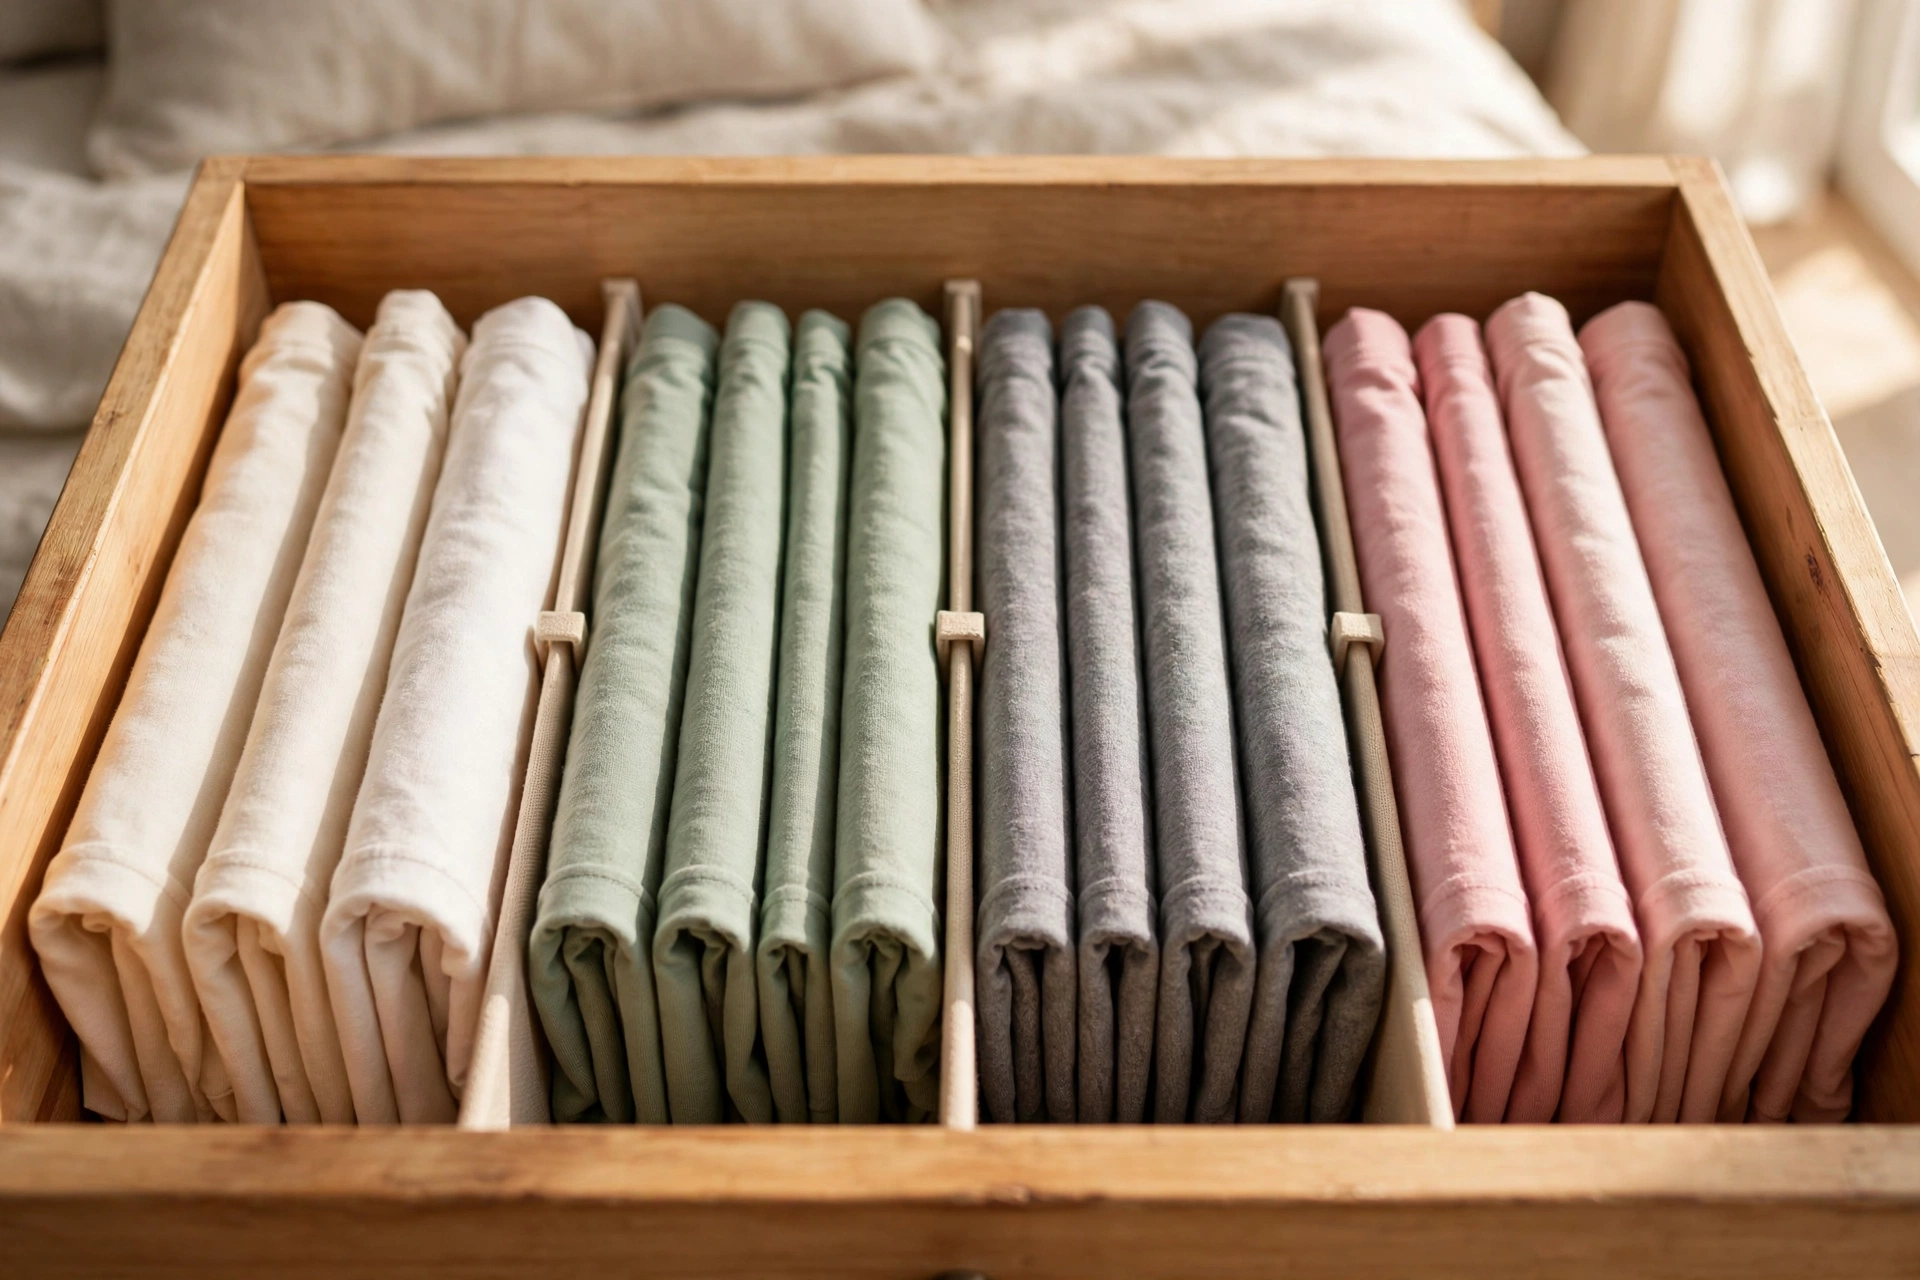
Instead, fold clothes into small rectangles and stand them up vertically, side by side, like files in a filing cabinet. This is the famous KonMari method, and it genuinely works: you can see the edge of every single item the moment you open the drawer. Picking a T-shirt becomes a two-second glance instead of an archaeological dig.
How to file-fold a T-shirt:
- Lay the shirt flat and smooth it with your palms.
- Fold one side toward the center, folding the sleeve back to make a straight edge. Repeat on the other side so you have a long rectangle.
- Fold the rectangle in half from the bottom, then in half or thirds again until it can stand on its own edge.
- The test: set it upright. If it flops over, fold it tighter. The folded packet should be roughly the height of your drawer.
Jeans work the same way: fold one leg over the other, tuck in the crotch to straighten the shape, then fold up from the hem into a chunky rectangle. Sweaters get the same treatment, just with looser folds so the knit does not stretch. Practice on five T-shirts and you will have the muscle memory — it takes about thirty seconds per shirt once you get the rhythm.
One warning: file folding alone is not enough. Without something holding the rows upright, they slump sideways as the drawer empties through the week — which brings us to the unsung heroes of the dresser world.
Step 4: Dividers, Inserts, and the Little Tools That Do the Heavy Lifting
Drawers are just empty boxes. Boxes need structure, or gravity and daily use will undo your beautiful folding within a fortnight. You do not need to spend much — most of these cost a few dollars — but they are what turns a one-weekend project into a system that lasts.
Adjustable drawer dividers. For wide dresser drawers, these spring-loaded or slotted dividers are the single best purchase you can make. Split a wide drawer into three or four sections: T-shirts in one section, tanks in another, workout tops in the third. The sections keep your file-folded rows standing even when half the clothes are in the laundry.
Honeycomb fabric organizers. Those grid-style inserts with dozens of small cells are perfect for the top drawers — socks, underwear, and rolled ties each get their own cell. One tip: roll underwear instead of folding it for these grids. A rolled pair tucks neatly into a single cell and you can spot colors instantly.
Shallow trays for the top drawer. A small tray corals sunglasses, watches, and everyday jewelry so they stop migrating to the bottom of the drawer. Nothing fancy needed — even a clean cigar box or a ceramic soap dish works beautifully.
Shelf liner. Cut non-slip liner to fit each drawer. It protects the wood, stops trays sliding around, and makes the twice-a-year wipe-down a two-minute job.
Labels. If you share a dresser, small labels on the inside lip of each drawer end the “which drawer is mine?” question forever. Masking tape and a marker work fine.
The point of all of this is one simple principle: every item needs a boundary. A divider, a cell, a tray — something that says “you live here.” Clutter is just items without addresses. Give everything an address and the mess cannot take root.
Step 5: Tame the Top of the Dresser (the Clutter Magnet)
Let us talk about the surface. The top of a dresser has a magnetic personality: keys, mail, receipts, a water glass from last Tuesday, three lip balms, and a tangle of cables all gravitate toward it. It happens because the top of the dresser is a flat, convenient landing zone with no defined purpose — so everything lands there.
The fix is to give the surface a job, just like the drawers:
- One tray for the daily drop: keys, wallet, watch, sunglasses. A single tray — nothing else allowed — keeps the landing zone contained.
- One lamp or one plant, not both plus a candle collection: leave real breathing room on the surface. An empty stretch of wood is a feature, not a void waiting to be filled.
- Ban the paperwork: mail and receipts do not live on the dresser. They get processed the day they arrive — trash, file, or act on it. No “deal with it later” pile.
- Corral the cables: if your phone charges there, use a small cable clip or a charging station so one cable sits neatly instead of four tangled ones sprawling across the wood.
Once the surface is intentional, it becomes decor instead of an eyesore — and a bonus: when the top of the dresser looks good, you will subconsciously keep the drawers inside it in better shape too.
Step 6: The Five-Minute Monthly Reset That Keeps It Working
No organization system survives contact with real life without maintenance, but maintenance does not have to be a project. Once a month — pick a date you will remember, like the first Sunday — do a five-minute dresser check:
- Pull out anything that does not belong (the stray hair tie, the receipt, the book you were reading in bed).
- Re-fold the rows that have slumped. This takes ninety seconds with file-folded clothes because you are just standing packets back up.
- Pull one item that has not been worn in a while and decide: wear it this week or donate it. This slow trickle of editing keeps the dresser from silently refilling.
Twice a year, align a bigger reset with the season change. When the weather turns, swap the off-season clothes out of your prime drawers using the same seasonal rotation logic that works for closets — my seasonal closet rotation ideas walk through the full process. It is also the perfect moment to check for worn-out socks and stretched waistbands before they earn another six months of drawer rent.
And remember the one-in, one-out rule: every time a new T-shirt or pair of socks enters the dresser, one old one leaves. It sounds strict, but it is the only thing standing between your beautiful new system and a slow return to the sock swamp. Drawers have fixed volume. Respect the physics and the system maintains itself.
One more thing worth doing while you are in closet mode: bulky items you moved out of the dresser need a proper home too. If shoes are the thing eating your closet space, my shoe organization ideas for small closets can win that space back so your sweaters and jeans have somewhere sensible to live.
Organizing a dresser is not really about the dresser. It is about making the first five minutes of your day effortless — opening a drawer and seeing exactly what you own, grabbing what you need, and closing it without a second thought. Empty everything once, give every drawer a job, file-fold instead of stacking, add a few dividers, and defend the surface. That is the whole system. Tonight, pick the drawer that annoys you most and start there. By the weekend, the whole thing will be done — and Monday morning will feel different.
[…] logic works across the whole dresser. If your top drawers are fighting you too, these ideas for how to organize a dresser will help you rethink the full layout, not just this one […]