

There’s a strange triangular void under your staircase right now — collecting dust, housing the vacuum cleaner, and wasting some of the most valuable square footage in your house. The best under stairs storage ideas turn that dead space into the hardest-working corner of your home: hidden drawers, a reading nook, a mini office, or simply a place where the shoes finally live instead of migrating across the hallway.
It works because staircase voids are bigger than they look — often thirty or more square feet of volume hiding behind a blank wall. This guide covers the full playbook: what to check before you build anything, pull-out drawers that disappear into the wall, slope-following shelves, budget-friendly ways to close it off, and the functional nooks worth building when storage alone isn’t ambitious enough.
Before You Build: Measure Twice, Check What’s Behind the Wall
Under-stair projects fail for boring, preventable reasons — so start with the unglamorous homework. First, figure out whether your stairs are self-supporting. In many homes the wall under the stairs is structural, or the staircase framing itself carries loads you must not cut. If you’re unsure, a quick consultation with a contractor is worth every penny before anyone takes a saw to a stringer.
Next, check for hidden infrastructure. Stair voids are favorite hiding spots for wiring, plumbing runs, and HVAC ductwork. A stud finder with electrical detection, plus a careful look from any existing access panel, tells you what’s back there. Plan around it — rerouting a pipe turns a weekend project into a month-long saga.
Then measure the space honestly, at multiple points. The defining feature of under-stair space is the slope: you might have six feet of headroom at the tall end and eighteen inches at the low end. Sketch the profile on paper with real dimensions, and design for the slope instead of fighting it — tall storage where it’s tall, shallow drawers or fixed panels where it’s low. Note the location too: stairs near the entry beg for shoe and coat storage, while stairs near the living room suit books, media, or a bar setup.
Under-Stairs Storage Ideas: Pull-Out Drawers, the Hidden Workhorses
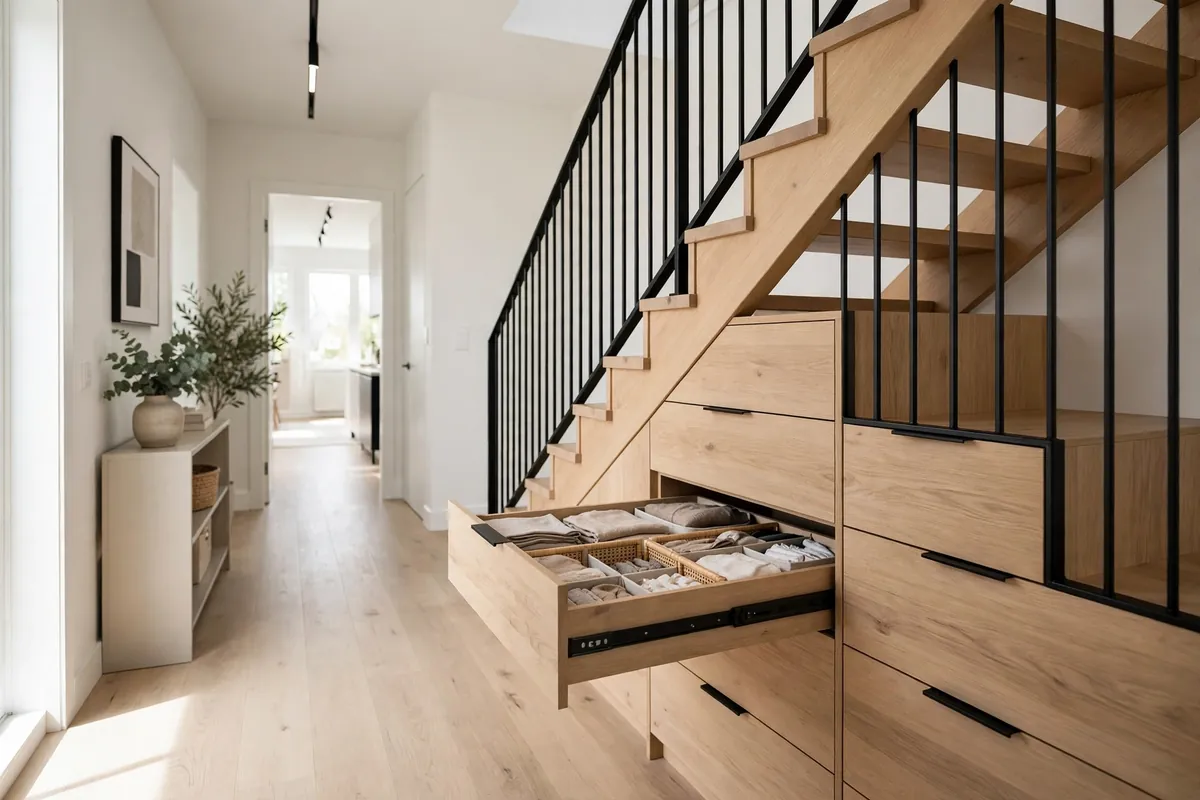
If you build one thing, make it pull-out drawers. Custom drawers that follow the staircase slope are the highest-value under-stairs project for most homes: deep, accessible, and completely invisible when closed. Unlike fixed shelves buried in a dark void, drawers bring the contents to you — no crawling in with a flashlight to reach the back.
Design them around what the location demands:
- Entry-adjacent stairs: deep drawers for shoes, with a shallower top drawer for keys, sunglasses, and the dog leash. This alone can declutter an entire hallway — pair it with our small entryway organization ideas for the full arrival-zone system.
- Living-room stairs: drawers for board games, throws, and media accessories, sized to the slope — tall drawers at the high end, shallow ones tapering down.
- Bedroom-adjacent stairs: out-of-season clothes, luggage, and linens in labeled drawers beat stuffing them in the closet.
For the invisible look, use push-latch mechanisms instead of handles and paint or finish the drawer fronts to match the surrounding wall exactly. The storage simply disappears — guests will never know it’s there. Spend the money on quality soft-close drawer slides; cheap slides on heavy drawers sag within a year, and you’ll feel the difference every single day. Add a slim LED strip or puck light inside the tallest drawer bay — under-stair voids are naturally dark, and lighting is what separates “clever storage” from “mysterious cave.”
Open Shelving That Follows the Slope
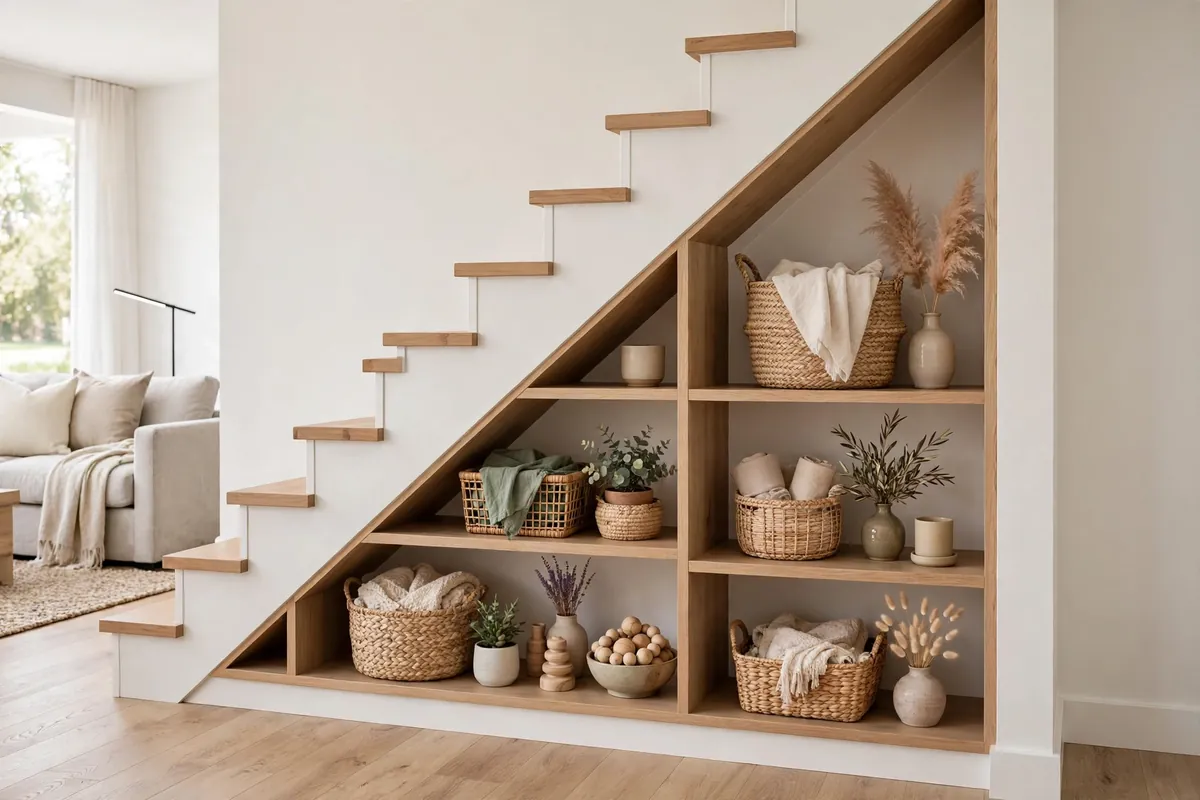
Not everything needs to hide. Open shelving under the stairs turns the void into a design feature — especially when the shelves step down in length to mirror the staircase above. Cut floating shelves to staggered lengths, anchor every one into wall studs (this is non-negotiable for anything holding books), and style them with a mix of storage and display.
The trick to open under-stair shelves looking intentional rather than cluttered is containment. Corral small items in matching woven baskets, labeled boxes, or uniform bins — the eye reads a row of matching baskets as calm, while a row of random objects reads as mess. Use the shelves for:
- Books and media — the slope naturally creates a library wall effect
- Decorative storage: attractive boxes holding gift wrap, craft supplies, or photo albums
- A small plant collection — trailing pothos on the high shelves look fantastic against the stair angle
- Kids’ books and toys in low baskets they can reach themselves
Keep the styling edited — three to five objects per shelf max, with breathing room between them. And be realistic about dust: open shelves near entries collect it fast, so choose this option for things you touch often enough to keep clean, and put the rarely-touched stuff behind doors instead.
Close It Off: Doors, Panels, and Curtains
Sometimes the smartest move is the simplest: close off the void and treat it as a proper closet. A door or panel system gives you hidden, dust-free storage for the unglamorous stuff — luggage, seasonal décor, cleaning supplies, sports gear — without any of it needing to look pretty.
You have three tiers of approach:
- The invisible door (premium). A custom door built flush with the wall, painted the exact wall color, with a push-latch and no visible handle. It virtually disappears. This is the most expensive option but the most satisfying — pure architectural magic.
- Sliding panels (mid-range). Barn-style or modern sliding doors on a track, in wood, glass, or mirror. Easier to install than a flush door, and mirrored panels have the bonus of making hallways feel twice as large.
- Curtains or fabric panels (budget). A ceiling-mounted track with a curtain in a fabric that complements your décor. It takes an afternoon, costs very little, and hides a multitude of sins. Choose a washable fabric — under-stair curtains collect dust.
Whichever you choose, keep the interior organized with labeled bins on simple freestanding shelves — “if everything has a bin, the closet stays usable” is the whole philosophy. You don’t need it to be beautiful inside; you need to be able to find the Christmas lights without an excavation. If the rest of your hidden storage needs the same treatment, our under-bed storage guide applies the bin-and-label system to the other great forgotten space.
Beyond Storage: Nooks Worth Building
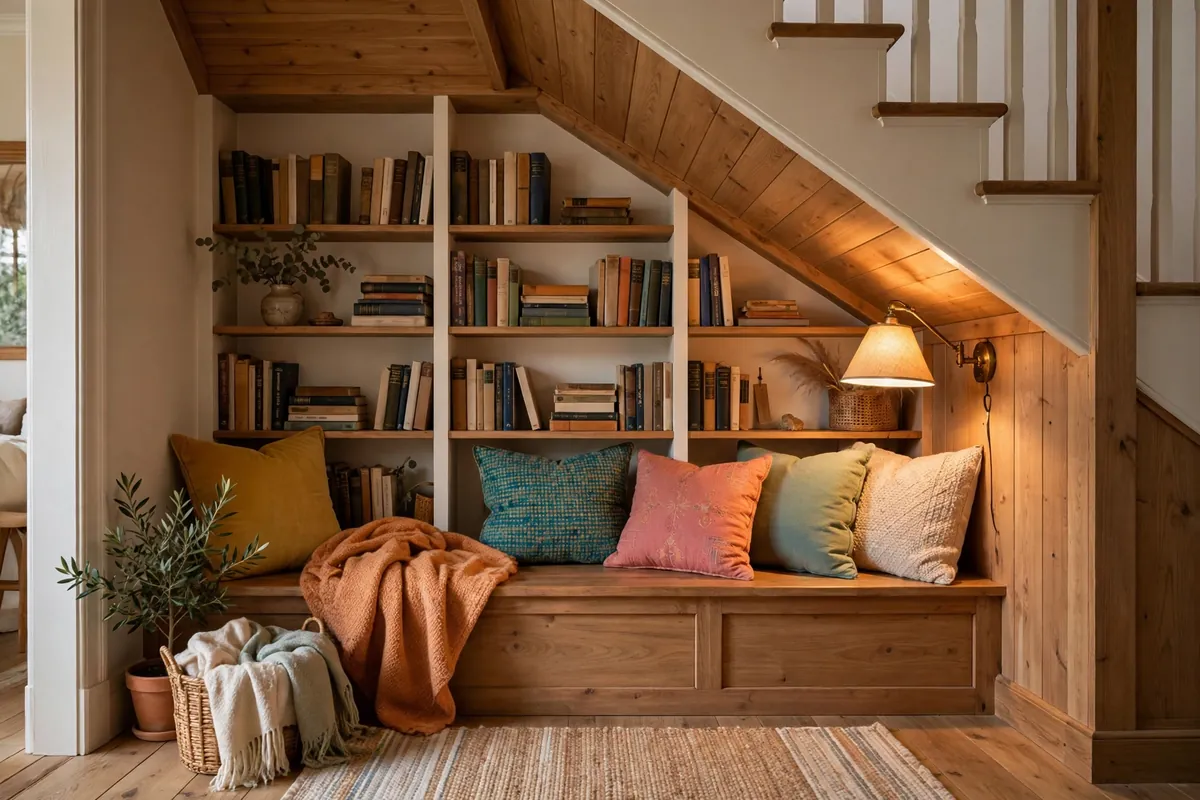
Here’s where under-stair space gets exciting: it doesn’t have to be storage at all. That oddly-shaped void might be the perfect footprint for something your home is missing.
- The reading nook. Build a simple bench with a lift-up top (hidden storage inside — the best of both worlds), add a thick custom cushion and a pile of pillows, mount a small directional reading light on the wall, and you’ve built the coziest corner in the house. Kids and adults fight over these.
- The mini home office. A built-in desktop spanning the width of the space, a few shelves above for supplies, a wall-mounted task light, and one electrical outlet turn dead space into a genuine workstation. In small homes, this can be the difference between working at the dining table forever and having a real desk.
- The under-stair bar. A waist-height cabinet with a countertop, a mounted shelf for glassware, and a small beverage fridge create a compact entertaining station. Add LED strips and a mirrored backsplash and it looks far more expensive than it was.
- The kids’ hideaway. A pint-sized door, some cushions, and a string of fairy lights turn the low end of the stairs into a magical den. It’s the rare project that’s both storage-adjacent and pure joy.
- The wine display. Cool, dark, and tucked away — under-stair voids are naturally suited to wine storage, from a simple rack to a proper temperature-controlled nook for collectors.
The nook approach works best when the space is awkward for standard storage — very low headroom, odd angles, or a location far from where you’d haul storage bins. If your home is short on square footage generally, our small apartment storage ideas have more ways to make every inch earn its keep. And before any built-in project, it’s worth doing a full-home pass with our room-by-room decluttering guide — new storage works best when it’s not just housing clutter you should have released.
Finishing Touches: Light It, Label It, Love It
Whatever you build, three finishing details separate a professional-feeling project from a DIY disappointment. First, lighting. Under-stair voids are naturally dark, and dark storage doesn’t get used. Battery-powered LED puck lights or a slim stick-on strip cost very little and make drawers, shelves, and nooks genuinely inviting. For reading nooks and offices, a proper wall-mounted light on a switch is worth the electrician’s visit.
Second, labeling. Hidden storage only works if you can find things six months later. Label every drawer front discreetly (inside the top edge works), every bin clearly, and keep a simple list on your phone of what lives where. Future you, hunting for the Halloween decorations, will be grateful.
Third, ventilation. Fully enclosed under-stair closets can trap humidity, which is bad news for anything stored long-term. If the space feels damp, leave a small gap at the top of the door, add a vent grille, or toss in a moisture absorber. Dry storage is safe storage.
Stop Walking Past Wasted Space
Every day you walk past that blank wall under the stairs, you’re walking past thirty square feet of potential. Whether you go for invisible pull-out drawers, slope-following shelves, a simple curtained closet, or a full reading nook, the principle is the same: design for the slope, light the darkness, and give the space a job.
Start this weekend with the measuring tape and the stud finder — the homework costs nothing and prevents every expensive mistake. Then pick the project that matches your budget and your home’s needs. A year from now, you won’t remember what the void looked like. You’ll just wonder how you ever lived without the storage.