
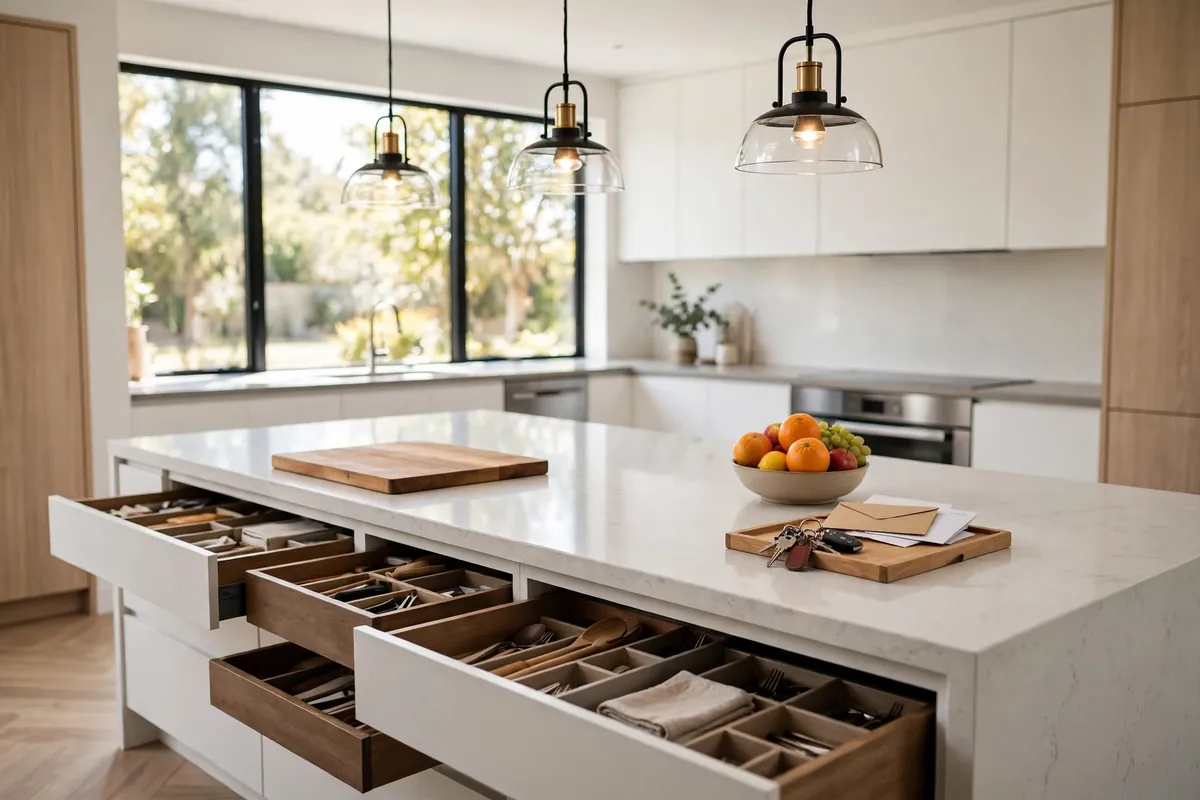

Picture a Tuesday evening at twenty to seven. You’re chopping onions for dinner while a school permission slip, a tangle of phone chargers, the mail from last Thursday, and last night’s cutting board all compete for the same square foot of island. You shove it all aside, chop faster, and tell yourself you’ll deal with it later. Later never comes. That’s the exact kind of everyday chaos that good kitchen island organization ideas are meant to solve — not with matching canisters and a color-coded spice drawer, but with a system that fits the way your household actually lives.
Here’s the thing nobody tells you: the kitchen island is usually the hardest-working surface in the whole house — prep station, homework desk, coffee bar, mail drop, buffet line, and hangout spot, often before lunch. No wonder it turns into a clutter magnet.
Give Your Island a Job Description Before You Buy a Single Organizer
Walk into any kitchen and the island with the most clutter is almost always the one with the vaguest purpose. It became the household’s default landing pad because nobody ever decided what it was for. So step one has nothing to do with organizers. It has to do with three honest questions, answered out loud, ideally with everyone who uses the kitchen:
- What happens here every single day? Real answers, not aspirational ones. Chopping vegetables, packing lunches, kids doing homework, paying bills — write down the truth, even if the truth is “everything.”
- What only happens here sometimes? Holiday baking, birthday cake assembly, Sunday meal prep. These are seasonal or weekly events, not daily ones, so they don’t get daily real estate.
- What should never happen here? This is the fun one. Maybe it’s “no charging cables,” or “no backpacks,” or “no craft projects.” Naming the forbidden items out loud makes the boundary real.
Once you have your answers, draw invisible zones. Most islands can comfortably hold two or three: a prep zone nearest the stove or sink, a serving zone near the seating overhang, and a landing zone on whichever side faces the main entry to the kitchen. My neighbor did this last spring and the change was immediate — her kids’ homework migrated to the serving end, keys and wallets claimed a small tray on the landing side, and the middle stayed clear for actual cooking. Nothing new was purchased. The island just finally had a job description.
Kitchen Island Organization Ideas for the Countertop: Clear by Default
The countertop is where clutter is born, so the goal here is ruthless simplicity: keep it clear by default. A clear counter isn’t just prettier — it means dinner prep starts in seconds instead of starting with a ten-minute excavation. Walk through these moves one at a time:
- Create one landing tray, and only one. Pick a low-sided tray or shallow basket and park it on the entry side of the island. Keys, sunglasses, the mail you haven’t opened yet — it all goes in the tray. When the tray is full, it’s a signal to process, not to start a second tray. This single container is the difference between “organized drop zone” and “slow-motion avalanche.”
- Give appliances a real home or evict them. The air fryer you use twice a week doesn’t earn countertop residency. Move occasional appliances into the island cabinetry or a nearby pantry shelf. If something truly lives on the counter — say, the coffee maker or the knife block — give it a defined footprint, like a small wooden board or tray underneath, so it reads as intentional instead of drift. For a full rethink of which tools deserve your limited counter space, these kitchen gadget organization ideas walk through the same keep-or-relocate logic appliance by appliance.
- Move knives off the counter with a magnetic strip. A bulky knife block eats a surprising amount of prime counter space. Mounting a magnetic strip on the side of the island or on a nearby wall frees that footprint instantly, keeps blades visible and dry, and — bonus — keeps them out of small hands when mounted high enough.
- Cap the decor at two items. A fruit bowl and a small plant, or a candle and a stack of cookbooks — pick two, max. Decorative objects multiply like rabbits when nobody’s enforcing the limit, and every extra object is one more thing to wipe around.
Here’s the mindset shift: the countertop is not storage, it’s a workspace. Every item sitting on it should be earning its square inch every single day.
Turn the Deep Drawers Into the Hardest-Working Storage You Own
Island cabinetry is prime real estate — close to the action and easy to reach from multiple sides. Yet most islands hide a sad secret inside: one cavernous drawer where lids, pans, and mystery gadgets pile into an archaeological dig. Deep drawers are the best storage format in a modern kitchen, but only if they’re subdivided. A wide, deep drawer with no dividers is just a horizontal closet.
Start with the drawer nearest your prep zone and treat it like a toolkit:
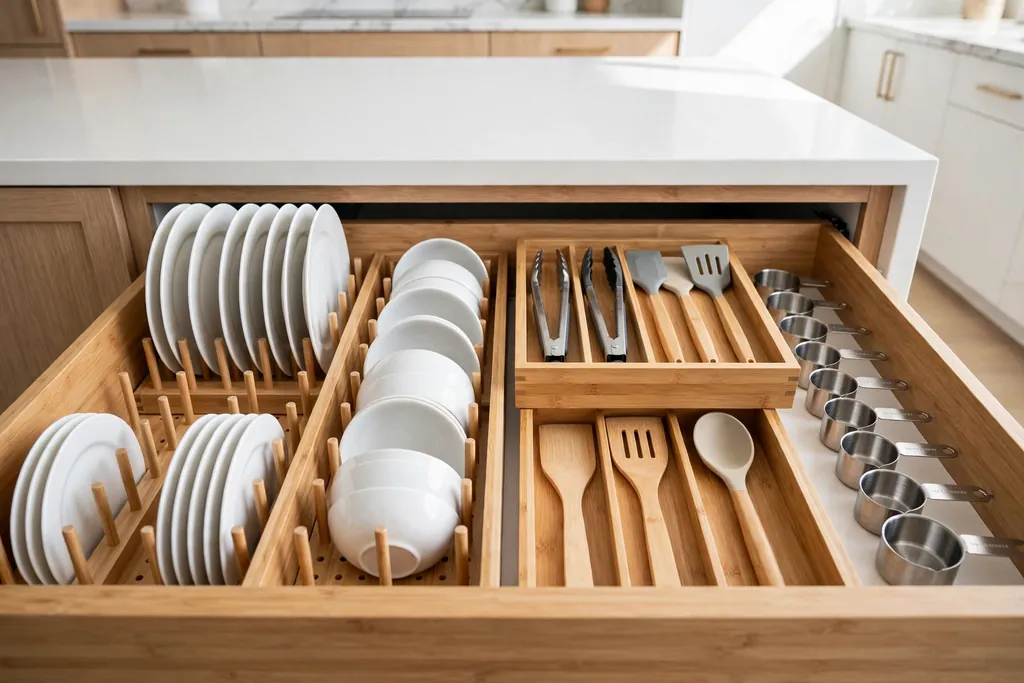
- Pegboard drawer dividers for dishes and bowls. These adjustable peg systems let you stack everyday plates and bowls vertically in deep drawers without the dreaded slide-and-clatter. Everything stays put when the drawer opens, and you can reconfigure the pegs in minutes when your dish collection changes.
- A dedicated baking drawer. If you bake even semi-regularly, corral the measuring cups, rolling pin, parchment rolls, and mixing bowls into one drawer. No more hiking to three different cabinets mid-cookie-dough. Flour and sugar in sealed canisters can live on the shelf directly above or below so the whole baking kit is one grab away.
- Two-tier organizers for utensils. A shallow top tray for spatulas, tongs, and whisks over a deeper layer for less-used tools doubles the capacity of a single drawer. This is the same principle that keeps the rest of the kitchen’s drawers from becoming junk territory — if you want the full method for taming every drawer in the room, these kitchen drawer organization ideas break down the zoning system drawer by drawer.
- File-fold the linens. Dish towels, cloth napkins, and placemats take up a fraction of the space when folded into neat rectangles and filed upright in a shallow drawer or bin, like files in a drawer. You can see every option at a glance instead of unearthing the good napkins from the bottom of a stack.
And don’t overlook the most underused drawer candidate of all: lids. A deep island drawer with a simple vertical rack turns a chaotic lid avalanche into a neat filing system — pair pots with their lids in the same drawer and the lid-hunting expedition ends for good.
The Sides and Back of the Island Are Storage Too
Most people organize the front of their island and completely ignore the other three sides. The sides and back are perfect for items you use often but don’t need dead-center — especially where two or three people cook at once.
The back side — the one facing the dining area — is ideal for shallow display storage: cookbooks, a row of pretty jars with pasta and grains, or your most-used serving bowls. Because it’s visible, it doubles as decor, which gives you a built-in incentive to keep it tidy.
The short ends of the island are the secret weapon. A slim pull-out spice rack on one end keeps seasonings one step from the stove without surrendering cabinet space — and if your spice situation has historically been “open the cabinet and pray,” this end-panel rack plus the tiered-drawer method in these spice organization ideas will change your weeknight cooking life. The other end can hold a towel bar, a row of hooks for aprons and oven mitts, or even a slim charging drawer with a power strip mounted inside — phones and tablets charge out of sight instead of sprawling across the counter.
The short ends of the island are the secret weapon.
Kitchen Island Organization Ideas for Small Kitchens, Carts, and Peninsulas
No built-in island? No problem. Everything in this guide scales down. A rolling cart, a butcher-block table, or even a narrow peninsula can play the island role in a small kitchen — the principles stay the same, only the square footage changes.
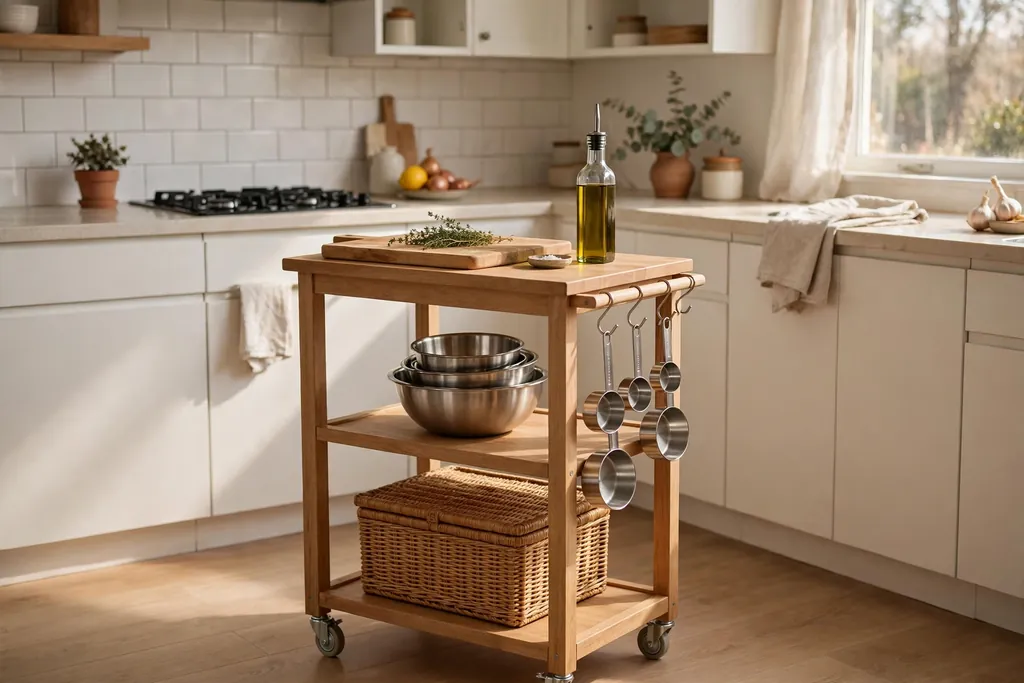
With a cart or compact island, storage has to work vertically because there simply isn’t much of it. A rolling cart with two shelves can hold your daily cooking kit on top, mixing bowls and the colander in the middle, and a lidded bin for potatoes and onions below. Add S-hooks to the side rails for measuring cups and a hanging basket for fruit, and a 24-inch cart suddenly carries the load of a full island drawer stack.
- Over-the-side organizers hook onto the cart’s edge and hold wraps, foil, and paper towels without consuming a shelf.
- A lidded bin on the bottom shelf becomes the produce station — one container for onions and garlic, another for potatoes, both out of the light.
- Lock the wheels when you’re chopping; unlock them when you need floor space back. A mobile island that parks against the wall when dinner’s done is the small kitchen’s superpower.
- Keep the top ruthlessly edited. On a small surface, two items is the max — usually a cutting board and one workhorse tool. Everything else lives below.
The same zone idea applies in miniature: prep side versus landing side. Small kitchens actually stay organized more easily than big ones — every stray item is visible, which makes the daily reset faster.
The Five-Minute Habit That Keeps It Organized for Good
Every organization system eventually meets its true test: a normal, tired, busy Tuesday. The zones and dividers do the heavy lifting, but one tiny habit keeps the whole thing alive — the five-minute island reset. Right after dinner, or right before bed, set a timer for five minutes and return every item on the island to its zone. Tray items get processed or tossed. Appliances go back inside. The landing tray gets emptied, not just tidied.
Two things make this stick. First, do it at the same time every day so it becomes part of the kitchen’s closing routine, like wiping the counters. Second, keep a small trash and recycling pull-out in the island itself — scraping plates and tossing junk mail takes seconds when the bin is one step away. If your under-sink area is currently doing that job badly, these under-sink kitchen organization ideas will help you build a pull-out system that actually works.
The reset isn’t about perfection. Some nights the island will still collect a stray permission slip or an abandoned coffee mug. That’s fine — five minutes a day beats a three-hour weekend purge every single time.
A well-organized kitchen island doesn’t look like a magazine photo. It looks like your Tuesday evening, minus the archaeological dig. Give the island its job description, keep the countertop clear by default, subdivide those deep drawers, put the sides and back to work, and close the day with a five-minute reset. That’s the whole system — no weekend overhaul, no guilt.
Start tonight with just the landing tray and the five-minute reset. By the end of the week, you’ll wonder how the island ever got that cluttered in the first place — and dinner prep will start the way it should: with a clear counter, everything in reach, and the onions already waiting.