

Last winter I bought a whole pork shoulder on sale — twelve dollars of beautiful, bone-in future pulled pork. I wrapped it carefully, slid it into the chest freezer, and forgot it existed. Six months later I found it fused to the bottom under a bag of peas, freezer-burned beyond saving. Twelve dollars straight into the bin, plus the hour I’d spent “organizing” around it. That was the day I stopped treating my freezer like a storage unit and started treating it like a pantry. These freezer organization ideas are everything I’ve learned since: how to stop losing food to the deep freeze, waste less, and actually eat what you buy.
Here’s the uncomfortable math. The average American household throws away hundreds of dollars of food every year, and the freezer — the appliance literally designed to prevent waste — is where a lot of it goes to die. Not because freezing doesn’t work, but because an unorganized freezer is a black hole: food goes in, and nobody can find it again until it’s inedible. The fix isn’t a bigger freezer. It’s a system.
Why Every Freezer Becomes a Black Hole
Freezers fail differently depending on the type, but the root cause is always the same: no zones, no labels, no memory.
Chest freezers are the worst offenders. That glorious deep space swallows everything, and whatever you need is always at the bottom. Digging through it means holding the lid open while cold air pours out — bad for the food, and it makes the compressor work overtime, which shows up on your energy bill.
Upright freezers look tidier but hide food in a different way: bags slide behind other bags, the back of every shelf becomes a fossil record, and the door bins collect ancient ice packs and half-used bags of berries nobody claims.
Fridge-top freezers — the little box above your fridge — are just too small for chaos. One overstuffed grocery run and you can’t close the door without performing surgery.
In all three, the pattern is identical: unlabeled bags of beige mystery, duplicates bought because you couldn’t see what you had, and a slow drift toward “I’ll deal with it later.” Later never comes. So let’s deal with it now.
Start Fresh: The Empty, Sort, and Toss Reset
You can’t organize around freezer burn. Pick a cool day — or borrow a neighbor’s cooler and some ice packs — and take everything out. Yes, everything. Lay it on the counter in groups and be honest:
- Keep: labeled, dated, and still within a sensible quality window (timing guide below).
- Eat this week: perfectly good but getting old — these become this week’s meal plan, starting tonight.
- Toss: unidentifiable, heavily freezer-burned, or older than your memory of buying it. That bag of “soup?” from two years ago is not soup anymore; it’s an artifact.
While it’s empty, wipe the interior with warm soapy water, check that the door seal closes tightly (a dollar bill shut in the door should resist being pulled out), and confirm the temperature is at 0°F (-18°C). A full reset twice a year — I do mine when the clocks change — keeps the whole system honest. If your freezer is frosted into an ice cave, defrost it properly first; a quarter-inch of frost is normal, but half an inch is stealing your space and your money.
Create Zones: The Foundation of Freezer Organization Ideas
Here’s the core principle behind every one of these freezer organization ideas: a freezer without zones is just a cold junk drawer. Assign every category a home, and suddenly you always know where to look — even with the lid open and cold air escaping.
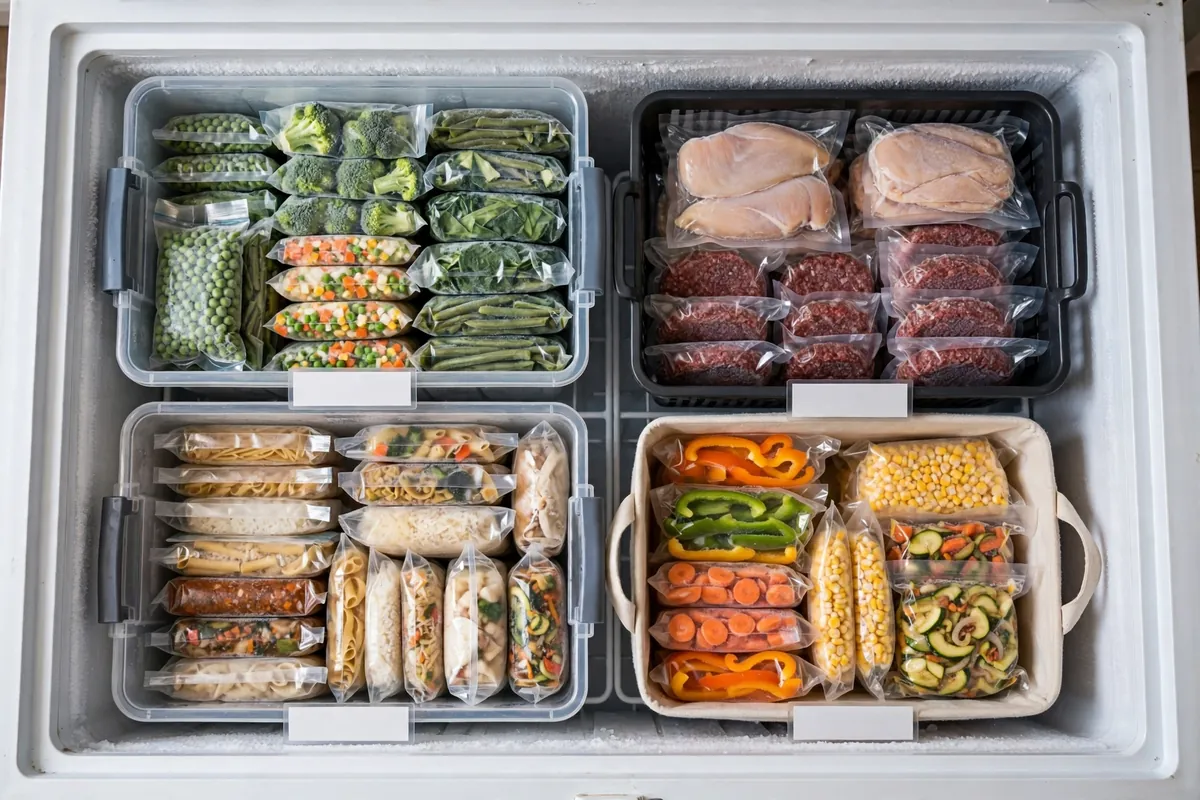
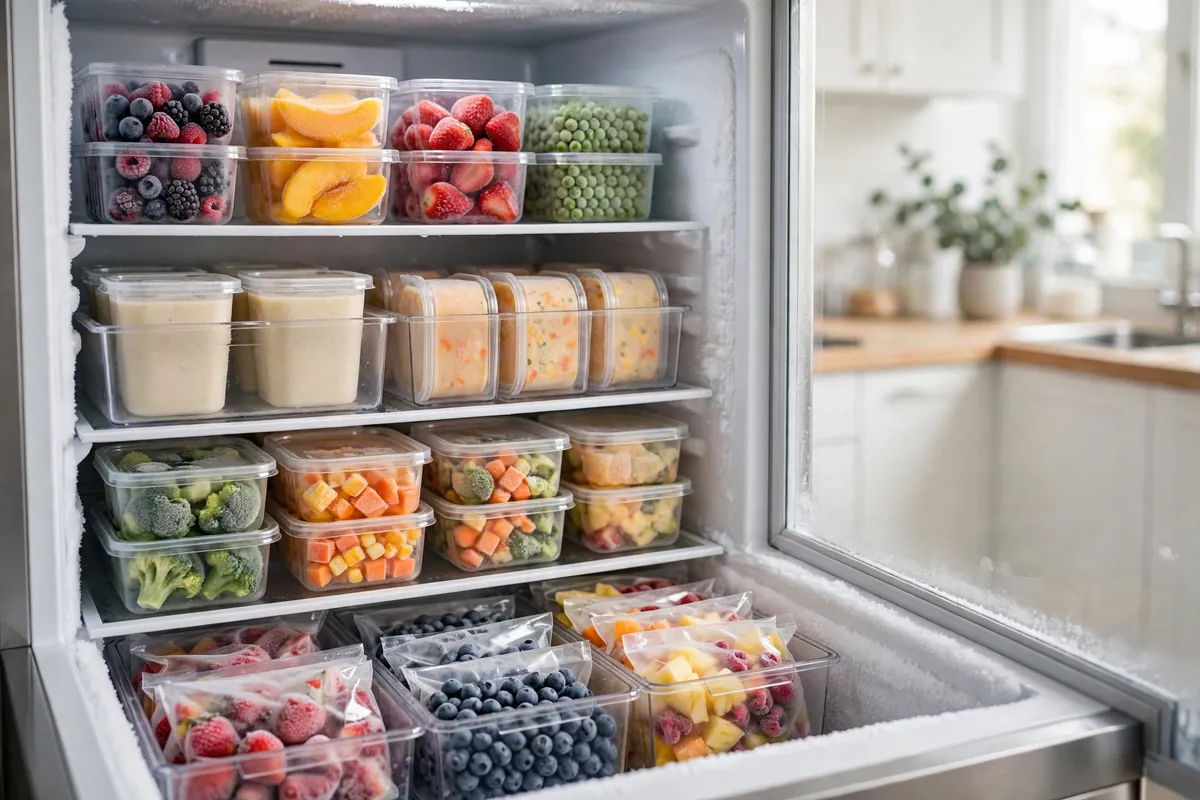
Start with bins and baskets — they’re the drawers your freezer never came with. For a chest freezer, use sturdy baskets with handles; milk crates are brilliant because they don’t crack in the cold and the handles let you lift a whole category out to reach the bottom. For an upright, clear stackable containers turn each shelf into a labeled drawer. Dollar-store bins work fine; you don’t need anything fancy, just something that survives sub-zero temperatures without going brittle.
Set up zones that match how you actually cook:
- Raw meats: one bin for chicken, one for beef and pork — always on the bottom, below ready-to-eat foods, so nothing drips where it shouldn’t.
- Prepared meals: the soups, chilis, and casseroles you froze on purpose. This is your weeknight rescue squad.
- Vegetables and fruit: bags of peas, berries, stir-fry mixes — the sides and smoothie fuel.
- Bread and breakfast: loaves, bagels, waffles, the emergency pizza.
- The “use soon” basket: anything that needs eating in the next two weeks lives here, front and center, in every freezer type. This basket alone probably saves the average family a hundred dollars a year.
Label each bin, not just the bags inside. A strip of masking tape and a marker on the bin’s edge means anyone in the house can put groceries away correctly — which is the real test of any system. If it only works when you’re the one unloading the shopping, it doesn’t work. For the fridge side of the equation, my guide on organizing the fridge so food lasts longer pairs perfectly with this one; the two appliances work as a team.
Can you use bins in a chest freezer?
Absolutely — they’re the single best chest freezer upgrade you can make. Use handled baskets or milk crates so you can lift whole categories out instead of digging. Avoid rigid bins without handles (you’ll never lift them when they’re full) and skip anything that covers the entire freezer in one lift-off layer; it gets too heavy and you’ll quietly stop using it.
Freeze Flat, Then File Like Folders
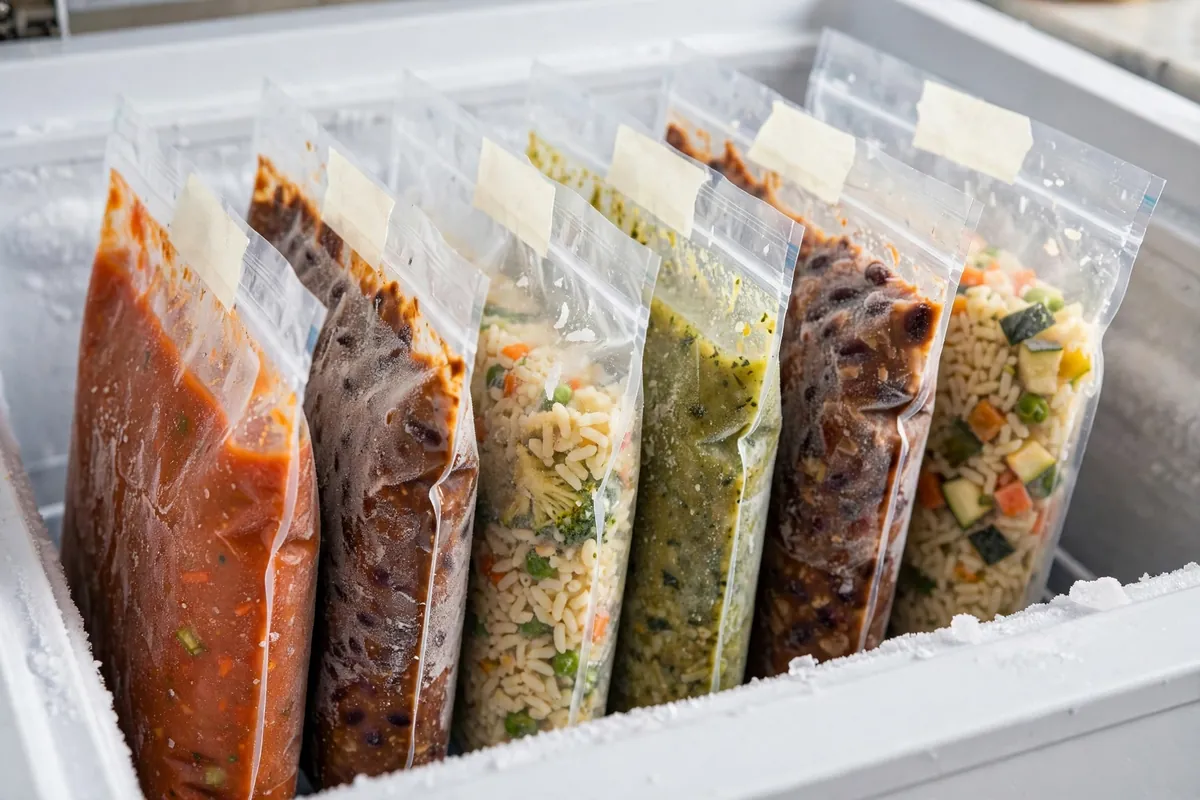
This is the trick that changed everything for me. Soups, stews, chili, sauces, ground meat, even cookie dough: freeze them flat in zip-top bags, squeeze the air out, lay them on a cookie sheet until solid — then stand them upright in a bin and file them like folders in a filing cabinet.
Flat-frozen bags take up a fraction of the space of bulky containers, they thaw in minutes instead of hours (a flat bag of soup thaws in a bowl of cool water while a tub takes all afternoon), and — best of all — you can see every single label at a glance. No digging, no lifting, no mystery. A bin that held four tubs can hold a dozen flat-filed bags.
A few flat-freezing rules I learned the hard way:
- Fill bags only three-quarters full and lay them flat — overfilled bags bulge and won’t file neatly.
- Squeeze out every bit of air before sealing; trapped air is what causes freezer burn.
- Freeze on a tray first, then file. Skip the tray and you’ll get lumpy bags that slide everywhere.
- Cool food before bagging. Putting steaming-hot soup straight into a bag creates condensation, which becomes ice crystals, which becomes freezer burn.
- Double-bag anything with bones or sharp edges that might puncture the plastic.
If you batch-cook regularly, portion into single-meal or family-meal sizes before freezing — future you, staring into the freezer at 5 p.m. on a Tuesday, will be grateful. And if your containers are currently a mismatched avalanche of lids, the food storage container organization guide will sort the lid situation in the cabinet above.
Label Everything (Your Future Self Will Thank You)
Every unlabeled bag in your freezer is a gamble, and the house always wins. A beige frozen lump could be chicken stock, potato soup, or last month’s smoothie experiment — and you will not remember, no matter how sure you feel right now. Label everything, every time, with three things: what it is, the date it went in, and the quantity or servings.
Masking tape and a permanent marker is the classic for a reason: cheap, sticks in the cold, peels off cleanly. Write on the tape before you stick it on a frosty bag, because ink smears on condensation. For bins, use bigger labels on the outside edge where they’re visible at a glance. If you want to get fancy, dissolvable labels wash off in warm water — no scrubbing, no sticky residue, and the containers come out ready to reuse.
The labeling habit pays off beyond the freezer, too. The same tape-and-marker system keeps a pantry honest, and the pantry decanting and labels guide shows how far a label maker and ten minutes can take a whole kitchen.
The FIFO Habit and the Inventory That Stops Waste
Zones and labels handle the where. Two habits handle the when: first-in-first-out rotation, and a simple inventory.
FIFO just means new food goes behind or under old food, so the oldest gets used first. In a chest freezer, new bags go at the bottom of the bin; in an upright, new containers go behind. It feels fussy for about a week, then it becomes automatic — and it single-handedly ends the “found a two-year-old roast” problem. When you bring shopping home, take thirty seconds to tuck new items behind the older ones instead of tossing them on top.
The inventory is the real game-changer. Stick a whiteboard or a sheet of paper on the freezer door — or keep a note on your phone — and log three columns: item, quantity, date in. When you take something out, cross it off. It takes ten seconds per item, and it transforms grocery shopping: you stop buying a third bag of chicken thighs because the list says you already have two. “Shopping” your freezer before the store is the easiest money-saving habit I know, and it pairs naturally with a budget-friendly pantry system that keeps the whole kitchen visible.
How long does everything actually last? As a rough guide at 0°F: soups and stews 2–3 months at best quality, cooked meat 2–3 months, raw poultry up to 9 months, raw beef steaks up to a year, vegetables 8–12 months, bread about 3 months. These are quality windows, not safety cliffs — food kept at 0°F stays safe indefinitely, but texture and flavor fade. Your labels make these windows easy to honor, and the “use soon” basket makes them automatic.
How do you keep track of what’s in a deep freezer?
The whiteboard-on-the-door method: item, quantity, date in — crossed off as you use things. For bigger households, a shared phone note works better since everyone shops. Either way, update it in the moment; “I’ll log it later” is how inventories die.
Try an “eat the freezer” week once a season: plan every dinner from the inventory before buying anything new. It’s weirdly fun, it clears out the stragglers, and it reminds you what you actually have in there.
I won’t pretend my freezer looks like a showroom. There are weeks when the “use soon” basket overflows and the inventory is two items behind. But nothing in there is a mystery anymore, nothing gets bought twice, and nothing ends up freezer-burned beyond rescue. That’s the whole goal: a freezer you can actually cook from, instead of a cold archive of good intentions. Start with one reset, five bins, and a marker — your grocery bill will notice the difference before the month is out.